TOO BUSY TO BLOG / RECIPE: THE BEST AVOCADO TOAST, May, 2016, Orient, NY

Life has been pretty hectic lately. We’re getting busier every week at the restaurant and I’ve been swamped with tasks large and small. In the past month I’ve had to let go of one waitress and hire a new one (which is much harder than it sounds), work double duty as waitress and manager to cover shifts and train the new waitress, print new menus and update our POS system. On the home front, we’ve started hosting friends at the farm, and I’m still traveling back and forth to the city every week, and it was Passover (or as Calvin calls it, Jewish Thanksgiving).

I’m finding it harder and harder to sneak some alone time to do the things I love most – embroidery, cooking and writing this blog. Last week, I sat down for an hour to write what I hoped would be and epic post about our recent trip to Uruguay, but got so distracted by the urge to start wandering that again I started planning another trip (Uruguay post will come soon, promise). So this week I decided to tackle a little less distracting and time consuming topic, something light and simple that doesn’t require any new recipe testing.

I’ve been trying to reboot my eating habits – something about the cold weather makes me crave carbs and sugar. Now it’s warming up and I’m 5 lbs over my happy weight, so it’s time to get serious about my diet. Even though I made a delicious chicken pot pie last weekend and have perfected my clafoutis recipe (it’s a sorta healthy, totally delicious Provencal dessert), on the regular it’s greens, whole grains and organic meat and poultry.

I wanted to share a recipe that’s filling, healthy, and super simple to make. Avocado toast! I know, all you have to do is spread avocado on toast and you have a pretty dope meal, but I like to think I make THE BEST avocado toast. (I’ve been making it pretty much every other day) Plus everyone from Smitten Kitchen (one of my favorite food bloggers) to Gwenyth Paltrow (one of my least favorite celeb bloggers) has shared their take on this classic meal slash snack. Smitten Kitchen’s recipe is great, the lassic toast – avo, salt and red pepper flakes, and Gwyneth’s is just plain old wacky – avocado and almond butter, no thank you. With my recipe, greens and homemade shallot dressing take the dish from ordinary to extraordinary, a giant step above your average toast. And it’s easy enough and tasty enough to make and eat every day.

Recipe and some new farm photos below.

AVOCADO TOAST WITH BABY GREENS AND A SHALLOT VINAIGRETTE

Makes enough for two pieces of avocado toast – can feed one or two people depending on how hungry you are! (But you’ll have enough shallot dressing for at least two more toasts!)

INGREDIENTS:

2 pieces of Ezekiel Sprouted Grain Bread (you can use any bread but this is my favorite)
1/4 of a lemon
1 avocado
1 shallot
3 tbs olive oil
1 table spoon red wine vinegar
1/4 tsp salt
pinch of oregano
freshly ground pepper
flaky sea salt
baby greens

PREP

1. Toast your bread to desired toastedness

2. Cut avocado in half, remove seed, scoop into a bowl. Squeeze lemon juice to prevent it from browning and mush together with a fork until smooth

2. On a cutting board, chop your shallot until roughly chopped, add salt, pepper and oregano and keep chopping until minced into a paste. Once it’s in a paste throw onto a jar and add olive oil and red wine vinegar and shake vigorously.

3. Spread avocado evenly on two pieces of toast. Take a handful of baby greens and sprinkle on top of avocado toast. With a spoon lightly dress your toasts – be sure to have a good amount of shallots all over! Sprinkle with flaky sea salt and freshly ground pepper and eat up!

Advertisement

SIX MONTHS LATER…/ RECIPE: SHEPARD’S (AKA COTTAGE) PIE, March, 2016, Manhattan, NY

IMG_5317.JPG

I’ve never been very good at keeping resolutions. One year for New Year’s not so long ago I decided to give up my bottled water habit – I have a thing for Evian – it just tastes better – but I knew bottled water was bad for both the environment and my wallet. I was so proud of this decision I flaunted my resolve to my friends and roommates, bragging how easy it would be, how much money I would save. By January 8th I’d totally caved, walked around the corner to Hana Food and indulged in a $3 bottle of water. When a roommate came home and caught me in bed with that tall drink of water, I humbly confessed, “I gave up.”

This year (of my birth, not the calendar), instead of setting resolutions I set goals. I realize that benchmarks are a more feasible alternative to my ambitious and perhaps unrealistic resolutions. But if you read my last post (from SIX MONTHS ago) you probably noticed that I have set A LOT of goals. Eating better, working out, writing more, traveling, success! I mean, I know I had a whole year ahead of me but I also have much I need to accomplish. I must say I’ve done pretty okay on some of my goals. Six months into my twenty-eighth year (okay, technically it’s my twenty-ninth) year I thought this would be a good time to evaluate my progress and finally update my blog. First and foremost, I GOT MY FUCKING DRIVERS’ LICENSE – something I’ve been putting off for 12ish years (I mean, I am a New Yorker, crazy good at the subway and a top-notch passenger), but an adult needs driver’s. Now I just need to master stick shift… I also renewed my passport, which will help me attain future goals! I’ve already pampered myself with a two-week vacation in Hawaii (travel blog-post coming soon) AND a trip to Uruguay (blog posts about both coming soon!). I’ve reshuffled my restaurant staff and have been booking parties left and right. At one point I was working out daily, though recently my work out schedule has dwindled, but hey, that’s way better than my exercise commitment over the past few years, which was never.

Going forward I plan to focus more on my blog and my diet. So here I go blogging about my eating habits AND sharing a super cozy recipe for the last cold nights of winter! Cold grey weather almost guarantees poor diet choices. The homemade pastas at my restaurant have been beckoning me with their delicious sauces and fresh meats and vegetables. I’ve also imbibed a fair amount of booze. But over the past few months I have to remind myself that I don’t have to be perfect. Everything in moderation is my mantra now; not exactly the Party Girl Plan, more like the Party Girl Plan Lite (but still pretty heavy). If I want to have gnocchi for lunch I’ll have a salad for dinner, not only because salad is the healthy choice but also because I know those greens will help my body digest the gnocchi, and TBH I really like salad. Smoothies in the morning instead of bagels. Dessert once (or twice) a week instead of every night and usually homemade. And for good measure, I’ll throw in a Pilates class here and there. It’s sweater season and I’m feeling good about myself and so should you!

In honor of the cooler weather and my dabbling with indulgence today I’m sharing the recipe for my mom’s Shepard’s Pie. I know, with a name like Isabella Gambuto you’d think I’m 100% Guido, but alas that conclusion is flawed. My mother is Jewish, of South African and English decent. My Grandmother Patricia is a very proper Londoner (accent, marmite, Sainsbury’s Red Label tea, keep calm and carry on and all that). This recipe is my mom’s version of one of her grandmother’s signature dishes. Though classically made with lamb, mom now makes hers with ground turkey and the rest of us make it with ground beef, which in the UK they call Cottage Pie. But this one is my recipe and I’m going to call it what I damn well please! Caramelized onions and seasoned ground beef, topped with layers of peas, roasted sweet potatoes and creamy mashed potatoes, all covered with grated sharp cheddar and baked in the oven. It’s the perfect one pot meal, great for a crowd or family dinner. Preparation is a little time consuming but totally worth the effort. It’s also even better the next day! I mean, I’m pretty sure this recipe could win a Shepard’s/Cottage Pie competition, if such thing existed…


FullSizeRender-3.jpgSHEPARD’S  aka COTTAGE PIE

Shepard’s pie is pretty much an entire meal – meat, potatoes and veggies – stacked into one delicious casserole. I apologize for the so-so photo – I made a super fun GIF of all the layers but an too computer illiterate to figure out how to post it on wordpress (help?!).

Serving size: 8-10 people. This is a good dinner party dish!

INGREDIENTS

2 LBS ground beef

1 large Spanish onion, chopped

2 tbs olive oil

1 beef boullian

1 cup water

3 large sweet potatoes

4 large potatoes

1/4 cup butter (1/2 stick)(I know, a lot of butter)

1/4 cup heavy cream (yea, I never said this was particularly healthy)

1 bag frozen peas

1/2 cup sharp cheese of your choice SHREDDED (I used a mix of parmesan and white cheddar)

salt and pepper

***heavy bottomed pot like a Le Creuset 

PREP:

  1.  peel potatoes and chop fourths. place in a medium pot and cover with water and bring to a boil. once water has boiled uncover pot and lower heat to a simmer and let cook until fork tender, about 15 minutes. once cooked, drain water and mash with butter and cream. salt and pepper to taste.
  2. while potatoes are boiling prick your sweet potatoes with a fork two or three times each and place on a tin foil lined baking sheet. put in over and heat to 425 degrees feranheit. bake for 30-45 minutes, until fork tender. once cooked, scoop out roasted potatoes and discard skins, salt and pepper to taste.
  3. while your sweet potatoes are roasting heat a large pan with olive oil and brown ground beef. make sure to drain any liquid released from beef from the pan – do this by covering your pan and carefully pouring out excess liquid into a bowl. you can discard this excess liquid
  4. once meat is nice and browned set removed from pan and set aside. add onions into same pan and sauté, making sure to pick up any little bits of beef stuck to the pan (that’s flavor baby!) you may need to add another glug or two of olive oil here. cook until tender and sweet about 10 minutes. Remove from oven and turn down heat to 400 degrees farenheit.
  5. add meat back in with onions, throw in beef boullian cube and cover with water. let cook until water is fully reduce and taste. if too salty or too dry add another 1/2 cup of water and let reduce again. salt and pepper to taste.
  6. the final step before layering your pie is to defrost your frozen peas! this can be done in the microwave, a steamer or a shallow pan filled with 1/2 inch water. just make sure to drain any excess liquid post defrosting!
  7. at this point you should have all five (YES FIVE) components of your pie ready and waiting! In your heavy bottom pan layer your ingredients in this order: : beef and onions, peas, sweet potatoes, mashed potatoes. Make sure you are evenly spreading the sweet and mashed potatoes.
  8. once put together it’s time for your final finishing touch: CHEESE! sprinkle the cheese of your choice all over the top. also feel free to add a couple pats of butter if you’re feeling crazy!
  9. once fully assembled place pie uncovered into oven (which should still be heated from your roasting) and cook uncovered for 20-30 minutes, until cheese is melted and the top is lightly browned. Let cool at least five minutes and then dig in!

***Optional eating advice — I like the mash my pie all together, unto a big ugly mess, that way you get a bit of beef, peas, sweet and mashed potatoes in every bite! But that’s just a suggestion!

And now a smattering of photos from the last half year of my life just because!

2 MONTHS POST SURGERY – THE PARTY GIRL PLAN / RECIPE: CHOPPED BABY KALE SALAD WITH CHILI CUMIN CHICKEN, April 2015, Brooklyn, NY

It has officially been two months since my surgery! The swelling and intense pain are almost entirely gone – I still have cramps and the occasional bad day if I push my body too hard. My surgeon says the procedure went flawlessly. He removed all the lesions, but, like cancer, endometriosis cannot be cured. Without treatment I’m succeptible to a relapse at any time. Because hormone therapy is the only medical option to stop the disease from coming back I just went through some tough decisions that I’m going to discuss on the blog today.

My surgeon recommended another hormonal IUD. This option involves the least amount of hormones because it is centralized right where the disease occurs. As I briefly discussed in my last endometriosis post – having the previous IUD inserted was the most painful experience of my life, arguably worse than the surgery itself. I was not keen on going through that again. But it was better than the other options. Hormone replacement pills (not birth control pills) would mean three times as many hormones and would almost definitely make me gain weight (way to play my vanity card, Doctor!). Hormone shots or a progesterone implant were too permanent – I couldn’t remove either if my body didn’t react well to the dosage. My surgeon was super gung-ho about the Mirena IUD and explained that my last one was situated low in my uterus and was rubbing against all the endometrial scar tissue that just happened to be clustered in the same place. This was why not only the insertion process but the entire month with the IUD were so incredibly painful. He guaranteed an easier sonogram-assisted insertion this time so he could actually see that it was in the right part of my uterus.  I still wasn’t convinced.

The boyfriend grew up in a homeopathic home – no vaccines, no over-the-counter medicines- and he is one of the healthiest and strongest people I know. When deciding what my next steps should be in this healing process I turned to his parents, specifically his father, Theo, for advice. Theo is a massage therapist, juice enthusiast, reike master, and a genuinely awesome, extremely healthy man. When I was first diagnosed with endometriosis Theo found this homeopathic website forum for women with the disease. There were a handful of cases where women had completely cured themselves of the disease by going on a diet similar to the cancer diet (no meat, no legumes, no sugar, no alcohol, no fun), alongside a juicing, supplement and yoga regiment. While these stories were incredible and inspiring, to be honest, I didn’t know if I could give up one of my greatest loves – FOOD – to cure this disease. Many of the stories were from women with stage-four endometriosis, whose only option after numerous surgeries was a hysterectomy. I’m still in my 20s, I love meat, cheese, pastries and BOOZE. I knew I couldn’t follow a strict enough diet to actually cure my disease.

Then I spoke to a family friend, Halina, who is a gynecological-endocrinologist, i.e. a fertility doctor. I mentioned my interest in a homeopathic remedy. I told her I wanted to find the cause of my disease – stress, diet, lack of sleep, and she chortled. Endometriosis doesn’t have a root cause, she told me, I couldn’t cure it with diet and exercise alone. If I didn’t intervene soon with hormone therapy I ran a high risk of reoccurrence that would lead to more surgery and, even more frightening, a very real possibility of future infertility. My chat with Halina ultimately led to my decision to get another IUD, along with a new diet and lifestyle. My surgeon kept his promise about the second insertion; it wasn’t anywhere near as painful as the first. All I needed was one day off and a couple days in stretchy pants to recover. It’s been five weeks now and I’ve had some pain, (nothing compared to pre surgery cramps) and am hopeful for my future. Now I can focus on my new “diet” and general lifestyle changes!

When I was first trying to decide which healthy lifestyle path to take I looked at two popular diets – Paleo and the Whole 30. My bar manager, Megan, had been Paleo for a month, was feeling amazing and lost 13 lbs (which I didn’t even think she needed to loose). Another girlfriend of mine and one of my blogger crushes, Elsie from A Beautiful Mess, had similar experiences with the Whole 30 diet. Both intrigued me but neither would work for me as a sustainable eating plan. No condiments, dairy, whole grains, or alcohol ever?! I could do that for 30 days but what about the rest of my life? I wasn’t doing this to lose weight, I was doing this to get heathy. I had to find a way to eat well without depriving myself. And so I created my own diet plan pretty much based off  Michael Pollan‘s book In Defense of Food whose motto is  “Eat Food. Mostly Greens. Not Too Much. I’ve cut almost all processed foods from my diet – no flour, nothing from a box, only whole grains, little to no dairy (and mostly goats’ milk products)) and whenever possible organic/antibiotic free/free range. I allow myself organic condiments such as tamari/soy sauce, sesame oil, miso paste, vinegar, raw honey and maple syrup. Over the past two weeks I cut all carbs  (just to see if I could) and it went extremely well – though I found myself missing quinoa and my Ezekial bread avocado toasts. I’ve still been drinking alcohol (almost always in moderation, minus a couple fun nights). I’ve cheated a couple time – at a friend’s engagement party I had a tiny little pig in a blanket or a bite of the boyfriend’s Philly cheese steak – but always small amounts and I have never felt guilty.

What I like about my non-diet diet plan, or if you will, The Party Girl Plan, is that it’s easy, sustainable, and allows me to continue eating foods I love. I don’t feel deprived, hungry and have almost entirely lost my cravings for rich foods and sugar! This coming from a girl who would eat a bowl of pasta and day and at least one package of sour candy in bed every night (with the boyfriend…) I feel healthier, stronger, and so far I’ve lost 10 LBS, plus my bowel movements are incredible! If you’re looking to change your diet, this is a great place to start.

In addition to eating well, I’ve started to move my body more. After lying in bed three months straight it feels so good to take walks and be on my feet. I’m not allowed to lift anything heavy or run yet so I’ve started practicing yoga, which I always thought I hated. BIG THANKS to my girlfriend Karla, who, along with our friend Ashley, runs Sync Studios, a Yoga and Cycling Studio in Williamsburg. Ashley has taken time out of her own busy schedule to do privates with me until I get my strength up. Hopefully in a few weeks I’ll be confident enough to take classes. And when I’m feeling super strong the boyfriend and I want to do Insanity (we’ll see if that actually happens!).

From now on I’m going to try and share recipes that are Party Girl Plan friendly! Below I’m sharing a recipe for a super filling chopped baby kale salad that has been a staple of mine these past two months. Feel free to switch out the butternut squash for any other type of squash or sweet potatoes – also if pistachios are a little too expensive (I steal them from my parents’ house)(Sorry parents!) pepitas work well too. And one last shout-out before I share; the chicken in the salad is inspired by a fellow Fieldston Alum/food blogger/healthy eater Pheobe Lapine, from Feed Me Pheobe. My good friend Lily turned me on to her blog and it has so many yummy healthy recipes (my favorite is her Carrot-Ginger dressing!) you should definitely check it out.

ALSO special thanks to the boyfriend for taking these fun photos of me and Misses Loretta the dog on his new camera I got him for his birthday. Clearly it was a present for both of us!

Chopped Baby Kale Salad with Chili-Cumin Chicken, Roasted Butternut Squash, Pistachios, Chia and Hemp seeds in a Miso-Maple-Balsamic Vinaigrette (What?!)

INGREDIENTS

For the Chicken:

1 chicken breast, chopped into bite size pieces

1 tsp chili powder

1 tsp cumin

1/2 tsp salt

tbs coconut oil

For the Salad:

about 2 cups baby kale

1/4 butter nut squash, roasted with olive oil, salt and pepper at 375° for 30 minutes

2 tbs pistachio nuts

1 tbs hemp seed

1 tbs chia seed

1 tsp really good flaky salt

For the dressing:

1 1/2 tbs melted coconut oil

2 tbs balsamic vinegar

1 small shallot, minced

1 tsp white miso

1 tsp maple syrup

PREP

1. cover chopped chicken in chili, cumin and salt and let sit for a couple of minutes. Heat pan and cover with coconut oil. Throw in spiced chicken and cook through, about 8 minutes, making sure you flip those little guys to get a nice brown on all sides.

2. while chicken is cooking make dressing, I recommend doing so in a jar, as it emulsifies the ingredients best. throw in shallot, oils, vinegar, miso, and maple syrup. shake vigorously and taste to make sure it’s just sweet enough!

3.to assemble salad- roughly chopped (I know, it’s already baby kale, but things taste better chopped, trust me), top with butternut squash, cooked chicken, pistachios, seeds and salt. drizzle over dressing (it’s rich you don’t need to much) ENJOY!

Continue reading

WHERE IN THE WORLS IS PARTY GIRLS PERSPECTIVE?! / RECIPE: BALSAMIC BRAISED LAMB SHANKS, March, 2015, Brooklyn, NY,

As many of you may have noticed (or at least my best friend Sarina did) I haven’t posted a single entry on Party Girl since NOVEMBER. I apologize to the handful of people who read my blog and hopefully enjoyed it every week. But first and foremost I apologize to myself, because I love this blog and the outlet of creativity is grants me. I created this space for myself, to inspire me to cook (my most favorite thing to do), socialize, share and write more. However, I let my own personal issues and pain hinder me from writing (and even cooking!). When life was too painful  to be at the restaurant, I found it selfish to come home and recipe test, let alone spend the 12+ hours it takes for me to finish a post (still rifled with spelling and grammatical errors, I know). I would like to take this opportunity to explain why I fell of the face of the blogosphere and explore the future of not only this blog but my personal health and wellness.

***Warning I will be discussing “feminine” issues such as periods and lady parts below, this will not be graphic but if you’re a wimp and can’t handle that I suggest just skipping to the yummy recipe and photos at the end!

As long as I can remember I have bad menstrual cramps. As I reached my mid twenties (when I was 24 was when it really got bad) these annoying cramps started to become debilitating. The first day or two of my period I would be unable to stand let a lone go to work, lying in bed with my hot water bottle and begging my parents for some sort of painkiller because nothing over the counter worked. About a year ago, at the urging of my father, I started looking into possible causes of this pain. Fibroids? Cysts? Endometriosis? There were a bevy of treatable and non treatable diseases which could be causing the pain. But then again it could just be that I had bad cramps. I made an appointment with my sister’s gyno and the nurse practitioner gave me a clean bill of health. She recommended birth control, specifically an IUD, to help alleviate the pain. I don’t want to get too into this, but I DESPISE birth control in almost any form (not condoms though – as RV’s mom told us freshman year of college “wrap it up!)”. Since I was 16 I have been on and off numerous types of the pill and the Nuva Ring, all of which made me crazy hormonal and not the regular happy go lucky girl I like to believe I am. Furthermore, I am at a high risk for breast cancer as my mother was diagnosed before the age of 50 (and survived without losing a single strand of her beautiful blonde hair). Long story short, I refused the IUD and figured it wouldn’t be the worst thing to live in pain one day every month.

Flash forward to this past November. The pain started 10 DAYS before my period even started and lasted for my entire cycle. At that point my sister (the unofficial family doctor who was just accepted in TUFTS MEDICAL SCHOOL) was convinced me there was something wrong. She just happened to be seeing our gyno, the wonderful and super awesome Dr. Deborah Ottenheimer (if you live in NYC go see this woman or just her practice, she is rad), explained what was going on with me and got me an appointment the very next day. Dr. Ottenheimer once again suggested an IUD, which she and literally every other medical professional agreed would be my best bet to alleviate the pain. For the time being she prescribed me Vicodin and I scheduled an appointment for two weeks later and was ready for the easy fix! Oh BOY was I wrong! The insertion itself was literally the most painful thing I have ever experienced, I almost threw up waiting for the cab ride home. The  intense pain subsided but for the next two weeks I had  constant cramps. I couldn’t work out, I couldn’t lift anything, I could barely be on my feet long enough to help with the dinner rush at the restaurant. At this point, my doctor realized there could be something seriously wrong and recommended a pelvic pain specialist, Dr. Kenneth Levey, at Pelvic Pain New York.

Before I met with Dr. Levey I had to fill out a twenty page history form, then there was another 10 page form when I arrived at this office an hour early (as instructed) rating levels and types of pain in different areas. After about thirty minutes speaking and a quick (spectrum free!) examination, Dr. Levey diagnosed me with a early stage of endometriosis and suggested surgery as soon as possible. (What is Endometriosis? I’m still now expert but it’s basically scar tissue in your uterus that can attach itself to other organs an causes CRAZY pain)(If you’re interested in more information check out the link or leave questions in the comments!) In some cases it can cause infertility. It’s somewhat scary but extremely treatable (I’ve been trying to keep my mind off possible fertility issues because it just stresses me out). He noted my history of growing pain and my lack of relief from birth control as red lights for the disease. We schedule surgery three weeks later and after a two week recovery I’m back at work and going forward with my life! I still have to treat the disease – just because it is removed does not stop it from coming back- and am starting some hormone treatments in the coming week. If you guys are at all interested in my post surgery medical life I’d be more than happy to share but for now I think that’s enough on my medical issues.

The reason I am sharing this all with you is that this disease and all the pain, suffering and recovery has brought me to a turning point in my life – I am 27 years old (relatively) healthy girl and I need to take advantage of that! Lying around for almost three months in constant pain and then another two weeks high on Percocet made me value life and what I do with it. I didn’t have the strength to go to work most days, let alone cook elaborate meals, host parties and then blog about it! I hardly left my apartment, saw friends rarely, never went to events but watched a lot of bad television. Now that I’m on the road to recovery, I want to spend the rest of my twenties (and hopefully 30s, 40s and so on) doing things that I love! And that includes this blog! For almost four months I have let pain hinder my work life, my personal life and my hobbies. This blog makes me happy because it is an outlet for me to be creative and share thing I enjoy.

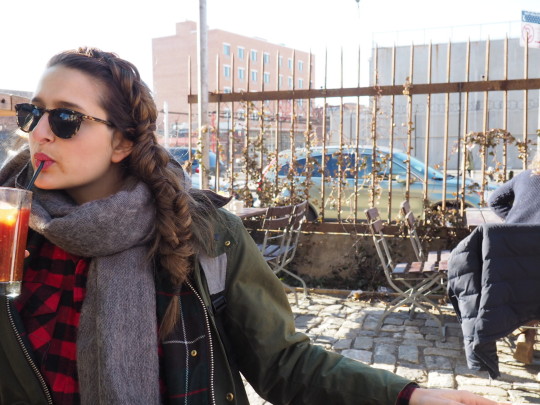
The moral of  this big serious post, there are going to be some changes in my life and on this blog. Being sick, figuring out what was wrong, needing surgery and the recovering was a wake up call to start living a healthier and more active life. And I want to reflect this new lifestyle in this blog. I am eating healthier – so far I’ve cut all all processed food, eating only grain free and organic meat, whole grains, no refined sugars and dairy free as much as possible. (It’s been a month and I’ve only caved to one tiny canoli – but I’m Italian so I pretty much couldn’t resist) I’m trying to live a more organized, active and social life, and hopefully soon when my body has fully healed, work out more (I already had a private yoga session last week)! I also dyed my hair back to brown and cut my bangs back to start feeling more like myself!  Furthermore, I want to spend more time doing things that I enjoy doing! Specifically, pursuing creative outlets (other than cooking) like my dorky crafts, passion for braiding and cross stitching. And I want to share these things with you! I want to post more often about more things and I hope you will enjoy them!

So to sum this all up, I’m sorry I was gone, I’m happy to be back and I hope any other ladies out there experiencing similar pain and confusion may read this post and go get some help. I thought I was super healthy with bad menstrual cramps for over two years and boy am I am glad I finally got help! Please leave any questions, support or concerns in the comment section – I’d love to start hearing from you (whoever you are!)

And just because I’ve been gone so long I’m sharing an original recipe for balsamic braised lamb shanks! Not the healthiest dish (seeing that there’s all that yummy brown sugar I’m no longer eating) but it’s a DELICIOUS recipe, that’s perfect for these last cold nights!

Serves 4(ish)

INGREDIENTS

4 small-sh lamb shanks

2 celery ribs, finely chopped

3 small carrots, finely chopped

2 small onions, finely chopped

2 cups red wine

1/2 cup balsamic vinegar

2 tbs flour

1 tbs butter

2 tbs brown sugar

1 cup beef broth

1 bay leaf

1 bunch of thyme, tied together with twine

salt & pepper

1 stick butter, melted (You can use less if you like but why?)

PREP

1. Preheat oven to 350. Liberally season lamb shanks with salt and pepper. Melt butter in large dutch oven over medium high heat. Brown lamb shanks on all sides, about 10 minutes all together. Transfer lamb shanks to a plate

2. Add chopped carrots, onions and celery (aka your mirepoix if you wanna get fancy) to dutch oven and sautee, stirring occasionally, until onions are brown , about 6 minutes. Add flour; cook, stirring constantly, until well combined, 2-3 minutes.

3. Stir in wine, balsamic vinegar and brown sugar, then add lamb shanks with any accumulated juices. Bring to a boil; lower heat to medium and simmer until wine is reduced by half, about 25 minutes.

4. Add all herbs to pot. Stir in stock. Bring to a boil, cover, and transfer to oven.

5. In a large bowl lightly mix together cornbread, pancetta, chopped sage and half of the melted butter.

6. Cook until lamb shanks are tender, 2–2 1/2 hours.

TIP

Serve with mashed potatoes. Really, whenever you braise something, it should be served with mashed potatoes.

You can transfer shanks to a serving dish and strain braising liquid and serve on the side. Or serve it “rustic” aka lazy style in your dutch oven and let everyone dig in!

AND JUST BECAUSE I WAS GONE SO LONG – HERE’S WHAT I’VE BEEN UP TO LATELY SLASH SOME NOT TOO GROSS SURGERY PHOTOS