SUMMER TIME / RECIPE: SUNGOLD, CORN AND ROASTED ONION SALAD, July, 2016, Orient, NY

image

All of a sudden it’s summer and things are growing! I’m not sure how
spring went by so fast… it seems like over night the farm went from
a brown/grey dirt patch to a lush bright green garden! It’s crazy how
many things and how much has grown just from Calvin and Peter working
the land – I must say I’m very impressed. Grass and weeds are
everywhere and we even have some food! Raspberries are popping up on
the bramble bushes – red, purple and yellow! Some veggies are ready to
pick – already made a salad from radishes, shallots and baby kale.
Meanwhile, the North Fork went from shuttered winter to open for
business summer. All the restaurants and attractions (aka the mini
golf place) are open and the summer crowds are coming out every
weekend. All the other farm stands are open for business and we
finally have a bounty of local produce – garlic scapes, kale, herbs
and hella zucchini. We’ve been making crazy fresh meals every night,
and on nights when we eat early enough ( we usually don’t eat till 10
pm) we even eat outside al fresco!

I have to say, I liked the North Fork in the winter but I love it in
the summer. It’s so nice to lounge by the pool or on the beach all day
and then just walk to the nearest farm stand to make dinner. It’ll be
even better in August when I can have Calvin pick our dinner from all
the veggies he grew himself!

Today I’m sharing a recipe I’ve already made several times this season
– sungold and corn salad. TBH almost none of the ingredients are
available locally (corn and tomatoes usually aren’t in season till the
end of the summer on Long Island) but its’ just so yummy and fresh I
can’t stop making it. It’s also a real crowd pleaser, super simple and
most importantly, can be made ahead of time! In the summer, I don’t
want to be in the kitchen for hours, I just want to have light and
simple meals that don’t require to much cooddeling. This is one of
those recipes.Though there are a few steps there are only a handful of
ingredients. This recipe is based off of one I read in Food52 a few
years back but I’ve tweaked considerably.

As per usual, recipe and farm photos below!

SUNGOLD, CORN AND ROASTED SUMMER SALAD ONION SALAD

image

INGREDIENTS

3 ears of corn – sweet corn is preferable if you can find it
1 large onion, roughly chopped
1 pint Sungold Tomatoes (those sweet little yellow guys), halved
4 scallions, thinly sliced
1 tbs olive oil
salt and pepper

PREP

1. Boil water and set oven to 375 degrees F

2. Chop onion and spread out on a cookie sheet – cover with olive oil,
salt and pepper and roast for about 30 minutes – until pieces are
cooked and slightly brown. Let onions cool so they can be handles and
then place in a large bowl.

3. Shuck corn, snap or cut cobs in half and boil for three minutes.
Let cool then carefully cut kernels off the cob and throw into the
same bowl as the onions.

4. Add halved sungold and thinly sliced scallion.

5. dress with 1 tbs of olive oil and salt and pepper to taste. Eat
right away while slightly warm, keep out and enjoy at room temperature
or refridgerate and eat later. It’s all good!

image
image
image
image
image
image
image
image
image
image
image
image
image
Advertisement

TOO BUSY TO BLOG / RECIPE: THE BEST AVOCADO TOAST, May, 2016, Orient, NY

Life has been pretty hectic lately. We’re getting busier every week at the restaurant and I’ve been swamped with tasks large and small. In the past month I’ve had to let go of one waitress and hire a new one (which is much harder than it sounds), work double duty as waitress and manager to cover shifts and train the new waitress, print new menus and update our POS system. On the home front, we’ve started hosting friends at the farm, and I’m still traveling back and forth to the city every week, and it was Passover (or as Calvin calls it, Jewish Thanksgiving).

I’m finding it harder and harder to sneak some alone time to do the things I love most – embroidery, cooking and writing this blog. Last week, I sat down for an hour to write what I hoped would be and epic post about our recent trip to Uruguay, but got so distracted by the urge to start wandering that again I started planning another trip (Uruguay post will come soon, promise). So this week I decided to tackle a little less distracting and time consuming topic, something light and simple that doesn’t require any new recipe testing.

I’ve been trying to reboot my eating habits – something about the cold weather makes me crave carbs and sugar. Now it’s warming up and I’m 5 lbs over my happy weight, so it’s time to get serious about my diet. Even though I made a delicious chicken pot pie last weekend and have perfected my clafoutis recipe (it’s a sorta healthy, totally delicious Provencal dessert), on the regular it’s greens, whole grains and organic meat and poultry.

I wanted to share a recipe that’s filling, healthy, and super simple to make. Avocado toast! I know, all you have to do is spread avocado on toast and you have a pretty dope meal, but I like to think I make THE BEST avocado toast. (I’ve been making it pretty much every other day) Plus everyone from Smitten Kitchen (one of my favorite food bloggers) to Gwenyth Paltrow (one of my least favorite celeb bloggers) has shared their take on this classic meal slash snack. Smitten Kitchen’s recipe is great, the lassic toast – avo, salt and red pepper flakes, and Gwyneth’s is just plain old wacky – avocado and almond butter, no thank you. With my recipe, greens and homemade shallot dressing take the dish from ordinary to extraordinary, a giant step above your average toast. And it’s easy enough and tasty enough to make and eat every day.

Recipe and some new farm photos below.

AVOCADO TOAST WITH BABY GREENS AND A SHALLOT VINAIGRETTE

Makes enough for two pieces of avocado toast – can feed one or two people depending on how hungry you are! (But you’ll have enough shallot dressing for at least two more toasts!)

INGREDIENTS:

2 pieces of Ezekiel Sprouted Grain Bread (you can use any bread but this is my favorite)
1/4 of a lemon
1 avocado
1 shallot
3 tbs olive oil
1 table spoon red wine vinegar
1/4 tsp salt
pinch of oregano
freshly ground pepper
flaky sea salt
baby greens

PREP

1. Toast your bread to desired toastedness

2. Cut avocado in half, remove seed, scoop into a bowl. Squeeze lemon juice to prevent it from browning and mush together with a fork until smooth

2. On a cutting board, chop your shallot until roughly chopped, add salt, pepper and oregano and keep chopping until minced into a paste. Once it’s in a paste throw onto a jar and add olive oil and red wine vinegar and shake vigorously.

3. Spread avocado evenly on two pieces of toast. Take a handful of baby greens and sprinkle on top of avocado toast. With a spoon lightly dress your toasts – be sure to have a good amount of shallots all over! Sprinkle with flaky sea salt and freshly ground pepper and eat up!

FARM UPDATES / RECIPE: SLOW COOKER FRENCH ONION SOUP, April, 2016, Orient, NY

It’s been two months since Calvin moved to the farm and things are starting to come together! The boys –Calvin and his best friend Pete (who’s family farm Calvin is managing)– have been working double duty, setting up the farm during the day and renovating the house at night. The house, originally built some time in the 19th century, was moved a couple blocks from its original location and then renovated in the 1970s. The place is huge –you might’ve seen some pictures, three bedrooms, living room, dining room, den, sun room, green house AND pool! There are tons of windows, it’s incredibly bright and has amazing views of a (different) farm and the bay. But it is a little outdated – fake wood floors, wood paneling everywhere, dirty dirty stairs and sparkly peeling wallpaper in every other room. While cute and cozy the house wasn’t really our style and we – well, mostly entirely the boys – have been turning it into our little late 20s dream home!

The first space they tackled was the living room/dining room – the rooms where we spend most of our time. The first thing the boys did there was whitewashed the wood-paneled walls and floors – and it looks incredible. Getting the entire room painted took some time but once it was done the room was transformed into a bright, modern space. We then culled the furniture in the house and brought in a couple of our own pieces to make the space feel more like us. We kept the old cozy couches, church pews and a newly refurbished wooden dining table (thanks to Pete!) and added our Oriental and Mexican rugs and some plants (also thanks to Pete!). The house now has a shabby chic feel. It’s not done yet –there are still paintings and photographs and stuff to hang on the fresh white walls. We’ve reserved one corner for a gallery wall and another for the Monstera plant of my dreams. I’m only out there two-three days a week so I can’t pitch in as much as they’d/I’d like, but I do  have some little weekend projects for myself, including these honey comb shelves, painting the dirty stairs and making a cork board. It’s so much fun to witness the transformation in progress. I’m excited to participate more over the next few weeks.

Meanwhile on the farm, things are slowly but surely blooming. I have lent a hand out there, but only barely, maybe an hour a week, but hey, that’s more than anyone expected of me. I helped hoe, plant and water berry bushes, and put up tree guards. (Meanwhile, Calvin’s planted hundreds of bushes, chopped down trees and built a chicken coop. He wins at farming) This past weekend the peach and nectarine trees blossomed, an awesome sight. The boys planted their first few trays of seedlings and will be able to plant hella vegetables and herbs in a few weeks and then we can look forward to eating our own food! That’s really what I’m most excited about, all the vegetables I’m going to be able to cook, pickle and can.

This week I wanted to share with you my crazy easy recipe for slow cooker French onion soup. That’s right, the whole thing is made in a slow cooker and takes almost no effort to get restaurant quality soup –and I can say that because I own a restaurant. I like to start this recipe before I go to bed – let the onions caramelize overnight and then add the beef broth when I wake up in the morning. That way by the time I’m home from work (at least when I’m not working the dinner shift) all I have to do it ladle the finished soup into ovenproof bowls, top them with some toasted crusty bread and grated gruyere cheese, and pop them in the broiler. It’s a great recipe to make for a Friday night dinner party, or, on the weekends when we entertain friends all day and don’t want to worry about making dinner. This super simple recipe is sure to wow and please a crowd.

ALSO, don’t toss those leftovers; save them for a slow braise later on in the week.

SLOW COOKER FRENCH ONION SOUP

serves 4-6

INGREDIENTS

6 spanish onions, sliced

1 32 oz package of Pacific Organic Beef Broth

Salt and Pepper to taste

1 loaf of crusty bread

1 tsp olive

8-10 oz of grated Gruyere Cheese

SLOW COOKER or CROCK POT

PREP

1. Set your slow cooker on low, throw in sliced onions and cover. Let sit 6-8 hours, until onions are caramelized.

2. Once onions are fully caramelized, stir  and make sure you get any stuck on bits from the bottom. Don’t worry if some a little more browned that others. Add beef broth and cover. Continue to cook on low for 6-8 hours.

3. Once cooked salt and pepper to taste. Ladle into over proof bowls or ramekins. Cut bread in hearty pieces that nicely fit into your bowl – then lightly toast in a heavy bottom pan with a teaspoon of olive oil. Top soup with bread and the cover with grated cheese.

4. Pop into the broiler at high for 5-7 minutes, until cheese is melted and bubbly and tinged brown.

Serve with salad and enjoy!

ENDOMETRIOSIS AWARENESS, March, 2016, Manhattan, NY

FullSizeRender-4

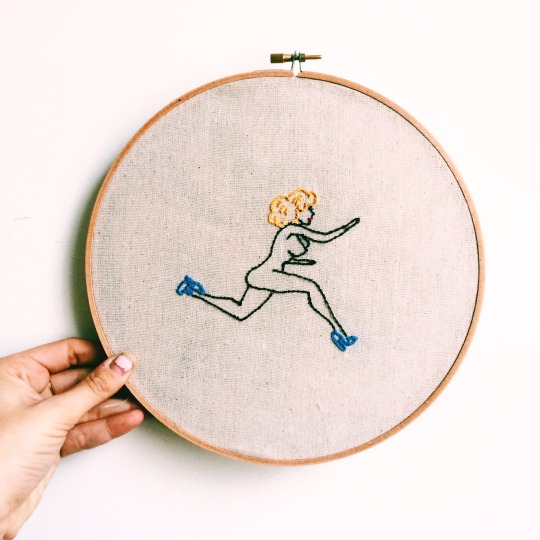
Today is the Endo March – where thousands of woman from all over the world march in an effort to raise awareness for endometriosis. This years US march is taking place in San Francisco and as I can not attend I’ve decided to post about it!

For the first time ever, articles about endometriosis will start appearing all over our mainstream media. There is a reason for this sudden interest in an all-too-common but much ignored disorder of the female reproductive system, and (surprise!)  it has to do with a celebrity. My fellow Oberlin alum Lena Dunham was recently rushed to the hospital for severe abdominal pain caused by ruptured ovarian cysts. What caused those cysts? Endometriosis. Since then all my Facebook newsfeed I see posts from media outlets like Refinery29 and Vice  about the disease, its causes and symptoms, the astounding numbers of women that suffer from it, their struggles with the pain and uncertainty. The most shocking and important statistic I’ve seen is this: one in ten people with a uterus will suffer with the disease at some point in her life, yet endometriosis is appallingly under-diagnosed. I feel for Lena and the untenable pain she’s had to endure, and I’m sending her my best wishes for a swift recovery. I also want to thank her for sharing her struggles with the public and bringing media attention it desperately needs.

I have written about my own experience with endometriosis as well as my efforts to curb the disease with a healthier more active lifestyle. In this post I want to talk about the severity of the disease, its problematic lack of diagnosis, and my own personal struggle with pain, diagnosis, surgery, recovery and treatment since my initial diagnosis last January.

***I will try my best to link all facts and figures I in this post — but bear with me, I haven’t written a research paper since 2009…

Endometriosis is a condition in which scar tissue similar to the endometrium, which in English we call the inner lining of the uterus, makes its way to the outside of the uterus, causing lesions that induce chronic inflammation and, eventually, scar tissue. “The symptoms of endometriosis include painful periods, painful ovulation, pain during or after sexual intercourse, heavy bleeding, chronic pelvic pain, fatigue, and infertility, and can impact on general physical, mental, and social well being.” More than 176,000,000 women – that’s one-hundred-and-seventy-six-million – worldwide currently have endometriosis. It is a chronic condition for which there is no known cure.  What make the disease so difficult to diagnose is a combination of the normalization of symptoms and the need to preform exploratory laparoscopic surgery to confirm the diagnosis. Moreover, as it is often associated with women in their early to mid-twenties, teenage girls can live with the disease for years before any doctor takes their complaints seriously. In too many of these cases the disease will have progressed beyond repair.

I have always suffered from dysmenorrhea, which in English we call really, really bad period pain. For the first two days of my menstrual cycle my cramps were so unbearable I couldn’t get out of bed. By my mid twenties the pain had become so agonizing that I kept emergency Vicodin on hand just to get through those days. For years I complained. A couple of years ago I started to worry that something was seriously wrong with me. I can’t tell you how many doctors and nurses told me my pain was normal or just part of being a woman. Even women doctors told me this. But I was also incredibly lucky to find a gynecologist and a surgeon that finally took my complaints seriously, diagnosed my disease and gave me the proper treatment. One year after post-op I still struggle with pain, fatigue or anxiety (i.e. endometriosis –it’s a chronic disease) almost every day.

The first six months after my surgery I was pretty much pain free – my periods were uncomfortable, not unbearable. But by June of last year I started feeling that same sharp debilitating pain, now centered on the left side of my pelvic area. After two trips to the doctor, another to my surgeon and one expensive ultrasound, the doctors found an ovarian cyst on my left ovary, the same issue that landed Lena in the OR for emergency surgery this past week. Because my cyst was relatively small they decided to monitor it. A few weeks later it had indeed shrunk and the pain lessened. In fact, my surgeon told me the cyst was good news, a sign that I was ovulating and fertile.

I had a hard time thinking of the agony that recurred twice a month as good news. My cramps can be so debilitating that if I don’t rest the pain will continue to plague me for weeks, but the constant demands of running the restaurant don’t stop because I need to rest. Sometimes the pain is so unbearable that I have to lie in bed half the day just to feel like myself again, though in truth on those days I feel lazy, unproductive and fatigued – anything but myself. Even on my best days I feel anxious, worried that I’ll need another surgery, or worse, that I won’t be able to have children when I’m ready. That’s my most overwhelming concern – fertility. I’ve always wanted to have children, and, because I come from a long line of fertile women I never thought I’d have to worry about getting pregnant. My doctors can’t tell me anything about my fertility until I’m ready to have children. They say I most likely won’t have any issues – we caught the disease early and I’m taking all the necessary precautions to prevent a recurrence – but for now we just cannot know for sure. I am definitely not ready to have kids yet; I still have so many more places to see and things to do before I take on that responsibility. Still, I can’t help but wonder; if I wait too long, will the disease get the best of me?

I went to some excellent schools with progressive health and sex education classes. We did learn about uterine issues such as fibroids and cysts in ninth-grade health class, and I’ve always kept current on issues of women’s health. And yet I suffered for more than a decade with excruciating menstrual pain before I even considered that I could have an actual diagnosable physical issue. Any passing awareness I had of endometriosis came from conversations with my friends, not my doctors. They didn’t begin to discuss a diagnosis until I was 27. But I’m lucky compared to some of the endo horror stories I’ve read – girls as young as 19 needing full hysterectomies that leave them infertile and still in pain.

We need to spread the word. We need to educate all women and girls, doctors, healthcare workers, mothers, fathers, and teachers about endometriosis. Our healthcare providers in particular must take women’s complaints seriously. Lena Dunham and my girl crush Padma Lakshmi, who founded www.Endofund.org, are among the celebrities suffering from the disease that have begun to raise the public’s awareness and educate women about their options. Pain is not normal. It’s not just in your head. Advil won’t fix the problem.  Treatment is available. Above all we need to share our stories and keep the conversation going, because if we don’t the consequences are not just painful, they’re irreversible and heartbreaking.

WE MOVED TO A FARM! / RECIPE: PAPA JOE’S GARLIC ROSEMARY ROASTED CHICKEN, SAUSAGES AND POTATOES, March, 2016, Orient, NY

We moved to a farm!!

Well kind of. The boyfriend, who will now be known by his Christian name, Calvin, moved to a farm on the east end of Long Island. I’m splitting my time between the farm and my parent’s place on the Upper West Side so I can run the restaurant five days a week. This isn’t a “We Bought a Zoo” situation (full disclosure, I’ve never seen that movie, but I’m assuming the plot is Matt Damon buys a zoo even though he has no experience running a zoo) – Calvin farmed for five plus years before moving to the city three years ago when I opened the restaurant. We even lived on a farm the summer of 2012 when Calvin was farming in Amagansett. After over three full time years in the city Calvin was offered a job managing an organic vegetable farm out in Southold — pretty much at the end of Long Island on the North Fork (not the South Fork which is the Hamptons)(the North Fork is way chiller)(it’s also wine country!) and he couldn’t be happier to be doing what he loves.

SO Calvin’s out on the farm full time with Misses Loretta the dog who is also doing what she loves – running around in open fields all day herding sticks. It’s a brand spanking new farm so he gets to start from scratch – planting, buying animals, setting up barns. You really need to lay all the ground work for the growing season early in the winter so even though they haven’t started growing anything yet (animal or vegetable) he has his work cut out for him cleaning out barns, building chicken coops and deciding what they’re going to plant and when. Eventually, he’ll have a full blown farm stand and sell at market but for now there’s lots of prep to be done!

What do I do when Calvin’s at the farm all day? If you know me at all you know I’m not helping. I’ve tried working on the farm a couple of times and  I don’t last long. I liken my experience farming to some of the worst school field trips I’ve been on – too cold, too hot, and plain old boring. But just because I’m no help on the farm itself doesn’t mean I’m no help at all! Once after a particularly frusterating day mulching garlic in Amagansett (mulching pretty much means throwing dead leaves on dirt) I gave up after about 20 minutes on a cold windy day, went back home and showed everyone up with two homemade challahs made from fresh farm eggs. I’m clearly much better at cooking the vegetables than growing them! And home cooked meals are always welcome on the farm or anywhere really. So I’m spending my off days on the farm cooking elaborate meals, blogging (!), teaching myself how to drive Calvin’s stick shift (and stalling a lot) and spending hours embroidering. It’s kind of awesome. It’s like I finally have the country house I always wanted! Plus the views from our house are RIDICULOUS. You guys should all come visit just to watch the sunset!

I’ll be posting updates of the farm’s progress from now on! Along with recipes I’ll be making based on seasonal vegetables Calvin will be growing from the farm. Today I’m sharing the very first meal I made at the farm — my Papa’s garlic rosemary roasted chicken, Italian Sausages and potatoes. It is an INCREDIBLE and easy one pan dish (just realized I’m posting two one pot meals in a row but whatevs). This recipe is also great for these last cold winter nights and equally enjoyable in warmer months. It’s great for a crowd but also holds up well if you make it for two and eat the rest as leftovers. I can’t wait to make it again with potatoes, garlic, rosemary and chickens all grown of the farm!

Even though my father has owned restaurants my entire life he almost never cooked. I’m pretty sure I’ve seen him cook three things – once he made me chicken soup when I was sick at home, once he had a date and he told me he was making her steak (I only saw the raw steaks, not the finished product) and this chicken dish which he has made for me over and over and I love every time. I first started making it on my own in college when I was a head cook at my co-op Tuesday nights — it feeds a lot of people and somehow the chicken always stays super moist and tender. It’s almost a full proof recipe! The real trick is to over stuff the pan and get a good 1/4 inch of olive oil on the bottom. The only time I’ve ever messed this recipe up was when I made it on a cookie sheet instead of the baking pan –  all the ingredients were too spread out and wound up dry and over cooked. You need the potatoes, chicken and sausage to be crowded together to create the ideal moisture to crispyness ratio. Don’t skip the extra step of browning the sausages before you bake – it gives them that extra oomf of flavor and texture. And make sure you nestle the sausage and chicken next to each other next to each other for optimal flavor enhancement. Now here’s what you’ll need!

PAPA JOE’S ROASTED GARLIC ROSEMARY CHICKEN AND POTATOES
Serves 6

INGREDIENTS
4 white thing fleshed potatoes – peeled and cut into 1 1/2 inch pieces
1 whole head garlic (we’re not kidding around here) – minced
6 chicken thighs – bone in!
1 lbs sweet or spicy Italian sausage – up to you
10-12 sprigs of FRESH rosemary – removed from stems and roughly chopped it should be about 1/4 cup
A LOT of olive oil – at least 1/3 to generously cover all ingredients and leave a 1/2 inch on the bottom on the pan while cooking
salt and pepper

1. preheat oven to 400 degrees

2. in a 9″x13″ baking dish (or around there – you can use a smaller baking dish but not a larger one. remember you want to crowd your ingredients in the pan) throw in chopped potatoes, half of the chopped rosemary, garlic and chicken and cover with olive oil so all ingredients are coated then add salt and pepper. Roughly mix ingredients together so chicken and potatoes are evenly covered in garlic, oil, rosemary salt and pepper. Set aside.

3. Heat 1 tbs of olive oil in a medium sized pan. Once hot brown the sausages on both sides -about one minute each- but do not cook through! You will be cooking the sausages along with chicken and potatoes so if cooked through on the pan they will get dry! Remove from heat and let cool till you can handle.

4. Once cooled but sausages into 4″ pieces and arrange with chicken and potatoes. You want all the ingredients to be touching! I find it easiest to spread out the potatoes, nestle the chicken and then squeeze sausages between the chicken and potatoes.

5. cover with more olive oil and salt and pepper and the remaining rosemary. Once again, you want there to be about a 1/2 inch pool of olive oil on the bottom of the pan – this helps keep the chicken moist while making the potatoes crispy and turns in tot he most delectable sauce once everything is good and baked.

6. bake for one hour – you want your chicken to be cooked through, juices running clear, with crispy skin. potatoes should be brown and crispy on the outside but fork tender on the inside.

7. served everyone a good portion of potatoes, one chicken thigh and at least one sausage! cover with oil sauce from the bottom of the pan and serve with crusty bread – you’re gonna wanna do some dipping!

GET A HOBBY: EMBROIDERY / PARTY GIRL GOODS, August, 2015, Brooklyn, NY

image

I’ve always been pretty artistic and crafty. In lower school, when I struggled with learning disabilities, I always received glowing reviews from my art teachers. They were especially taken with a series of “back of the head” portraits I drew of my classmates in the fourth grade. Seeing a passion develop my mother bought me water colors and acrylics and I soon begged her to invest in oils. I began taking painting lessons and made a few decent pieces but as soon as puberty hit I kind of forgot about my hobby. In high school I was so focused on modern dancing (which is so LOL to think about now) I only took one art class. At some point I picked up knitting but I was never very good, I don’t think I ever even finished a scarf. By the time I got to college I had all but forgotten about creating, other than crafts for theme parties and costumes (DUH).

Sometime during college I developed an urge to learn to needle point – mostly so I could make a pillow that said “Please Use the Ashtrays” (I collect vintage glass ashtrays, even though I’ve never been a cigarette smoker). I always talked about teaching myself but was hindered by the price of supplies and my habit of not finishing projects. Then about a year ago I needed some “Restroom” signs for my restaurant and after finding nothing I liked on Etsy I thought FUCK IT I’m going to teach myself needlepointing and make myself some restroom signs! After some quick googling, I realized needle pointing or cross stitch was a little too tedious for my ADD and decided regular embroidery was the way to go. I went to my favorite store, Michaels, spent $60 on supplies and one how to book and got to stitching.

Like most crafty things I picked it up pretty easily. I started to embroider while watching TV or riding the subway, rather than stare at my phone all the time. I made restroom signs, all of my dogs names in script, loral bouquets and  eventually started making presents for my friends and family. Then this past March, inspired by one of my best friend Lily’s save the date, card stock with vintage match books with all but two matches pulled out which read “We’re a perfect math!”. I played off the card and made this little matchbook with two perfect matches. It was one of their favorite engagement gifts and she urged me to start selling them and other stitched items. SO “The Perfect Match”,  which has become somewhat of a signature designs, and my Etsy store PartyGirlGoods were born!

I’m not going to lie to you and tell you my store was a total success right off the bat (it still isn’t). I first sold at a Brooklyn crafts market, which wasn’t the greatest experience. But it forced me to make enough inventory to stock my store with more than just the match books! I stitched glittery fish, naked ladies, tools and even collaborated with a good friend and artist Zuzu Snyder on really cool looking succulents. I’ve slowly but surely been stocking up my Etsy store and have made a handful of sales. In June Refinery29 even listed one of our succulents as a “25 Items Under-$30 Made For Brightening Up Your Apartment” which gave my store tons of traffic and a bunch of new followers. I am in no way internet famous or raking in the dough but let me tell you it feels so good to be making things! (And to have friends, random people and a website I love like things I’ve made) I love coming up with quirky ideas and making them come to life. I love thinking of thoughtful presents for friends and creating pieces they can keep forever. This is especially true for wedding and engagement gifts – it feels so good to give from the heart and not off the registry. (If you don’t want a gift from the heart, tough cookies cause I’m broke). It’s a very similar feeling as the joy I get from cooking – planning, executing, creating- it’s just a little more permanent.

I leave you with this advice – start making things! Wether it’s cooking, drawing, woodworking, tie dying! If you have the latent urge to create but have been ignoring it because you are too busy or too poor, trust me, you’re not! And an initial investment is worth it if it’s going to make you happy. I know it did for me.

GIRLS WEEKEND SLASH “FRIENDSGIVING” / RECIPE: PANCETTA SAGE CORNBREAD STUFFING, November, 2014, Quogue, New York

This past weekend my besties and I had a long overdue girls weekend. Back in our care free early twenties we would take girl trips all the time – rotating between friends and friends of friends country homes during winter but mostly summer for weekends away. In August we’d always go to Alie’s beach house, Memorial Day was usually the Hamptons, we’d spend cold winter nights in the Hudson Valley or go admire the changing leaves in the Catskills during peak fall. We’d always drink, take silly photos, play bored games, craft and cook a lot! Sadly, these girls trips have dwindled due to the fact the fact that we’re all GROWING UP and have significantly less free time. In the past year alone my friends have: produced television series and an award winning film, sold out two art shows, started business school, published books and one has traveled around the world at least three times. We are also spread across four different cities on three different continents. Add boyfriends and pets (ok just Misses Loretta) to that – getting together is difficult and rare! We try to do monthly (more like bi-monthly) brunches but when one of our expats returned home for a two months stint, it was clear a girls weekend was required!

Continue reading

PIG ROAST(S), August 2010 / July 2012, Redhook, (Upstate) NY

image

This coming weekend I have VERY big plans to roast a lamb in honor of mine and my friend Pete’s birthday. But before I blog about my upcoming roast I wanted to share some photos from my past roasts. PIG roasts that is! I have been lucky enough to host not one but TWO pigs roasts in my life time, all thanks to my bestie Spencer (as you may remember from earlier Party Pirls posts) and his loving parents (who just happen to be my unofficial god-parents) Marsha and Steven, who donated their lovely home and yard for the festivities.

Continue reading