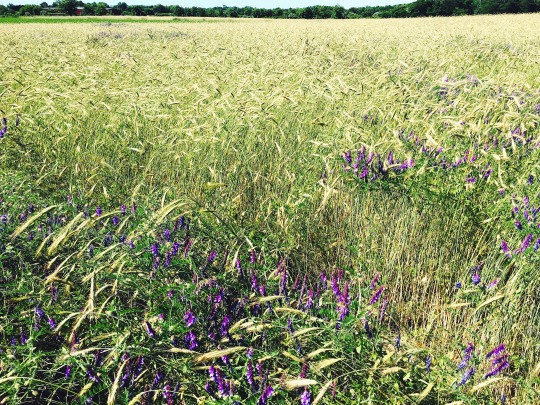
All of a sudden it’s summer and things are growing! I’m not sure how
spring went by so fast… it seems like over night the farm went from
a brown/grey dirt patch to a lush bright green garden! It’s crazy how
many things and how much has grown just from Calvin and Peter working
the land – I must say I’m very impressed. Grass and weeds are
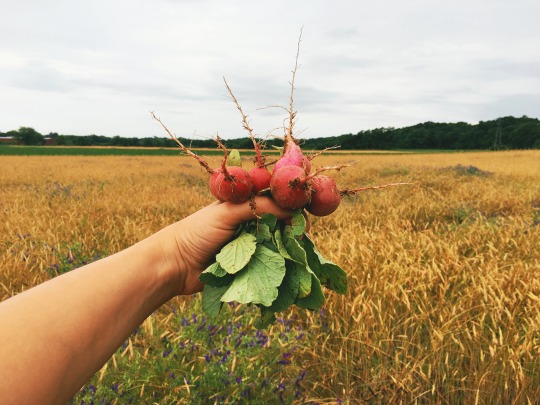
everywhere and we even have some food! Raspberries are popping up on
the bramble bushes – red, purple and yellow! Some veggies are ready to
pick – already made a salad from radishes, shallots and baby kale.
Meanwhile, the North Fork went from shuttered winter to open for
business summer. All the restaurants and attractions (aka the mini
golf place) are open and the summer crowds are coming out every
weekend. All the other farm stands are open for business and we
finally have a bounty of local produce – garlic scapes, kale, herbs
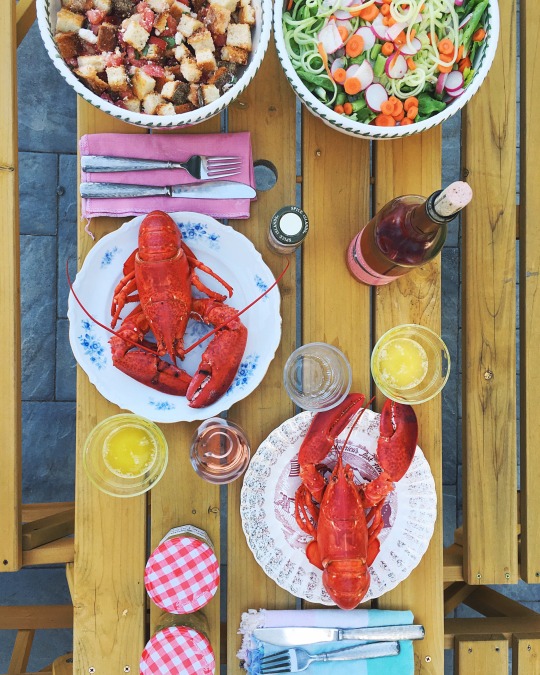
and hella zucchini. We’ve been making crazy fresh meals every night,
and on nights when we eat early enough ( we usually don’t eat till 10
pm) we even eat outside al fresco!
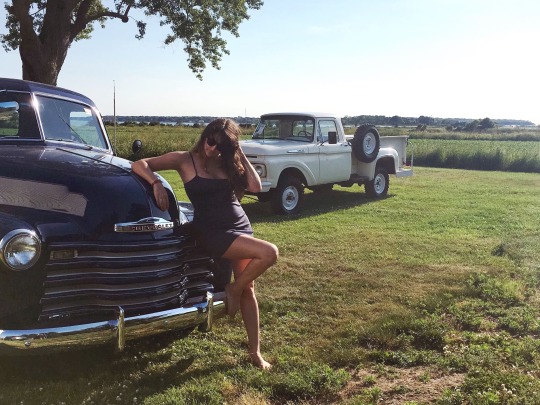
I have to say, I liked the North Fork in the winter but I love it in
the summer. It’s so nice to lounge by the pool or on the beach all day
and then just walk to the nearest farm stand to make dinner. It’ll be
even better in August when I can have Calvin pick our dinner from all
the veggies he grew himself!
Today I’m sharing a recipe I’ve already made several times this season
– sungold and corn salad. TBH almost none of the ingredients are
available locally (corn and tomatoes usually aren’t in season till the
end of the summer on Long Island) but its’ just so yummy and fresh I
can’t stop making it. It’s also a real crowd pleaser, super simple and
most importantly, can be made ahead of time! In the summer, I don’t
want to be in the kitchen for hours, I just want to have light and
simple meals that don’t require to much cooddeling. This is one of
those recipes.Though there are a few steps there are only a handful of
ingredients. This recipe is based off of one I read in Food52 a few
years back but I’ve tweaked considerably.
As per usual, recipe and farm photos below!
SUNGOLD, CORN AND ROASTED SUMMER SALAD ONION SALAD
INGREDIENTS
3 ears of corn – sweet corn is preferable if you can find it
1 large onion, roughly chopped
1 pint Sungold Tomatoes (those sweet little yellow guys), halved
4 scallions, thinly sliced
1 tbs olive oil
salt and pepper
PREP
1. Boil water and set oven to 375 degrees F
2. Chop onion and spread out on a cookie sheet – cover with olive oil,
salt and pepper and roast for about 30 minutes – until pieces are
cooked and slightly brown. Let onions cool so they can be handles and
then place in a large bowl.
3. Shuck corn, snap or cut cobs in half and boil for three minutes.
Let cool then carefully cut kernels off the cob and throw into the
same bowl as the onions.
4. Add halved sungold and thinly sliced scallion.
5. dress with 1 tbs of olive oil and salt and pepper to taste. Eat
right away while slightly warm, keep out and enjoy at room temperature
or refridgerate and eat later. It’s all good!
Life has been pretty hectic lately. We’re getting busier every week at the restaurant and I’ve been swamped with tasks large and small. In the past month I’ve had to let go of one waitress and hire a new one (which is much harder than it sounds), work double duty as waitress and manager to cover shifts and train the new waitress, print new menus and update our POS system. On the home front, we’ve started hosting friends at the farm, and I’m still traveling back and forth to the city every week, and it was Passover (or as Calvin calls it, Jewish Thanksgiving).
I’m finding it harder and harder to sneak some alone time to do the things I love most – embroidery, cooking and writing this blog. Last week, I sat down for an hour to write what I hoped would be and epic post about our recent trip to Uruguay, but got so distracted by the urge to start wandering that again I started planning another trip (Uruguay post will come soon, promise). So this week I decided to tackle a little less distracting and time consuming topic, something light and simple that doesn’t require any new recipe testing.
I’ve been trying to reboot my eating habits – something about the cold weather makes me crave carbs and sugar. Now it’s warming up and I’m 5 lbs over my happy weight, so it’s time to get serious about my diet. Even though I made a delicious chicken pot pie last weekend and have perfected my clafoutis recipe (it’s a sorta healthy, totally delicious Provencal dessert), on the regular it’s greens, whole grains and organic meat and poultry.
I wanted to share a recipe that’s filling, healthy, and super simple to make. Avocado toast! I know, all you have to do is spread avocado on toast and you have a pretty dope meal, but I like to think I make THE BEST avocado toast. (I’ve been making it pretty much every other day) Plus everyone from Smitten Kitchen (one of my favorite food bloggers) to Gwenyth Paltrow (one of my least favorite celeb bloggers) has shared their take on this classic meal slash snack. Smitten Kitchen’s recipe is great, the lassic toast – avo, salt and red pepper flakes, and Gwyneth’s is just plain old wacky – avocado and almond butter, no thank you. With my recipe, greens and homemade shallot dressing take the dish from ordinary to extraordinary, a giant step above your average toast. And it’s easy enough and tasty enough to make and eat every day.
Recipe and some new farm photos below.
AVOCADO TOAST WITH BABY GREENS AND A SHALLOT VINAIGRETTE
Makes enough for two pieces of avocado toast – can feed one or two people depending on how hungry you are! (But you’ll have enough shallot dressing for at least two more toasts!)
INGREDIENTS:
2 pieces of Ezekiel Sprouted Grain Bread (you can use any bread but this is my favorite)
1/4 of a lemon
1 avocado
1 shallot
3 tbs olive oil
1 table spoon red wine vinegar
1/4 tsp salt
pinch of oregano
freshly ground pepper
flaky sea salt
baby greens
PREP
1. Toast your bread to desired toastedness
2. Cut avocado in half, remove seed, scoop into a bowl. Squeeze lemon juice to prevent it from browning and mush together with a fork until smooth
2. On a cutting board, chop your shallot until roughly chopped, add salt, pepper and oregano and keep chopping until minced into a paste. Once it’s in a paste throw onto a jar and add olive oil and red wine vinegar and shake vigorously.
3. Spread avocado evenly on two pieces of toast. Take a handful of baby greens and sprinkle on top of avocado toast. With a spoon lightly dress your toasts – be sure to have a good amount of shallots all over! Sprinkle with flaky sea salt and freshly ground pepper and eat up!
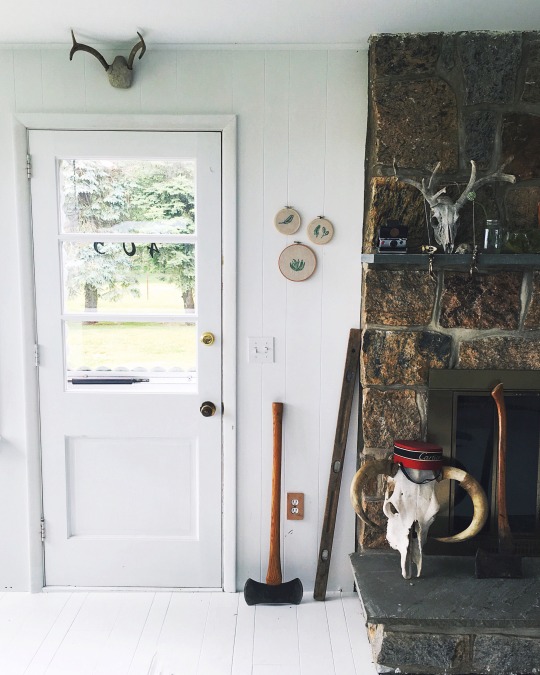
It’s been two months since Calvin moved to the farm and things are starting to come together! The boys –Calvin and his best friend Pete (who’s family farm Calvin is managing)– have been working double duty, setting up the farm during the day and renovating the house at night. The house, originally built some time in the 19th century, was moved a couple blocks from its original location and then renovated in the 1970s. The place is huge –you might’ve seen some pictures, three bedrooms, living room, dining room, den, sun room, green house AND pool! There are tons of windows, it’s incredibly bright and has amazing views of a (different) farm and the bay. But it is a little outdated – fake wood floors, wood paneling everywhere, dirty dirty stairs and sparkly peeling wallpaper in every other room. While cute and cozy the house wasn’t really our style and we – well, mostly entirely the boys – have been turning it into our little late 20s dream home!
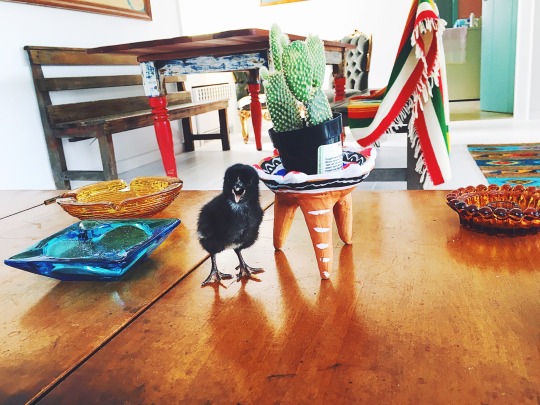
The first space they tackled was the living room/dining room – the rooms where we spend most of our time. The first thing the boys did there was whitewashed the wood-paneled walls and floors – and it looks incredible. Getting the entire room painted took some time but once it was done the room was transformed into a bright, modern space. We then culled the furniture in the house and brought in a couple of our own pieces to make the space feel more like us. We kept the old cozy couches, church pews and a newly refurbished wooden dining table (thanks to Pete!) and added our Oriental and Mexican rugs and some plants (also thanks to Pete!). The house now has a shabby chic feel. It’s not done yet –there are still paintings and photographs and stuff to hang on the fresh white walls. We’ve reserved one corner for a gallery wall and another for the Monstera plant of my dreams. I’m only out there two-three days a week so I can’t pitch in as much as they’d/I’d like, but I do have some little weekend projects for myself, including these honey comb shelves, painting the dirty stairs and making a cork board. It’s so much fun to witness the transformation in progress. I’m excited to participate more over the next few weeks.
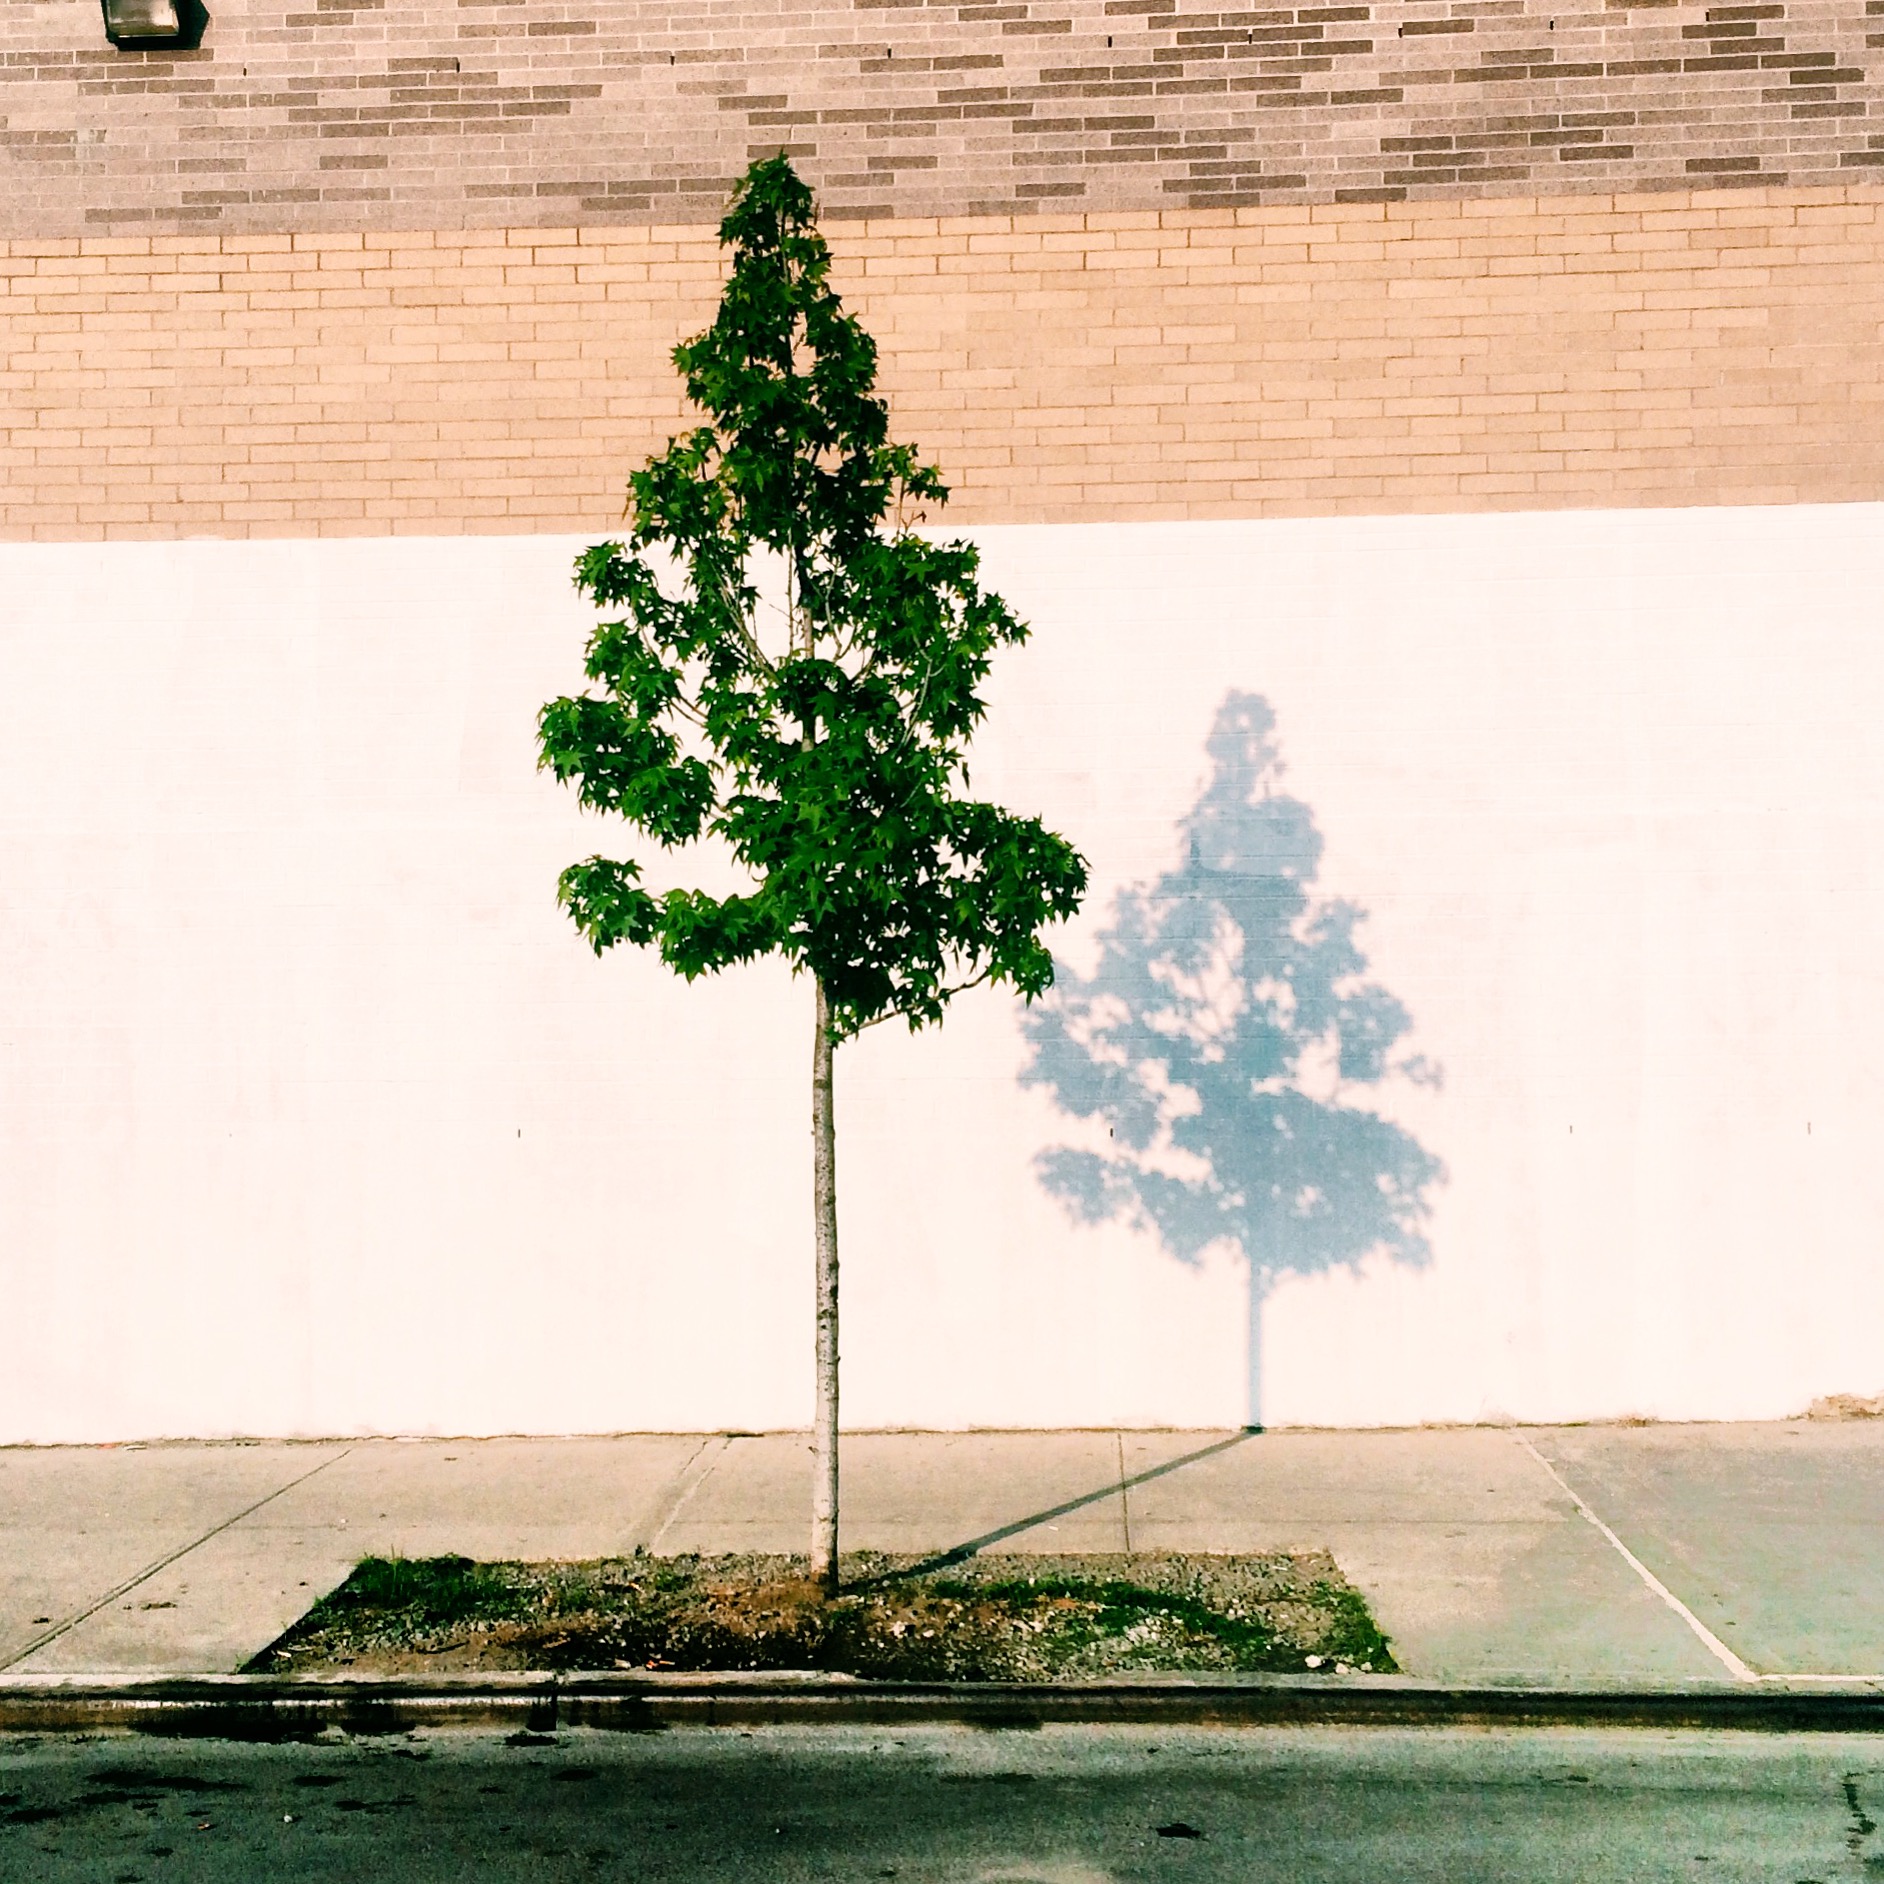
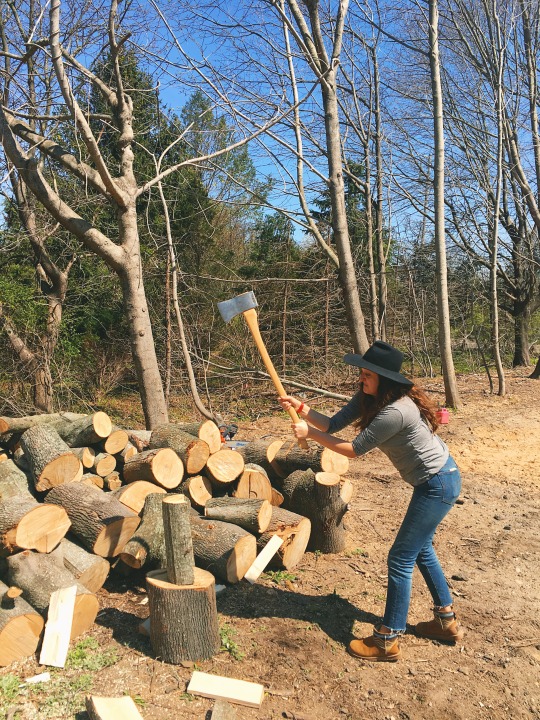
Meanwhile on the farm, things are slowly but surely blooming. I have lent a hand out there, but only barely, maybe an hour a week, but hey, that’s more than anyone expected of me. I helped hoe, plant and water berry bushes, and put up tree guards. (Meanwhile, Calvin’s planted hundreds of bushes, chopped down trees and built a chicken coop. He wins at farming) This past weekend the peach and nectarine trees blossomed, an awesome sight. The boys planted their first few trays of seedlings and will be able to plant hella vegetables and herbs in a few weeks and then we can look forward to eating our own food! That’s really what I’m most excited about, all the vegetables I’m going to be able to cook, pickle and can.
This week I wanted to share with you my crazy easy recipe for slow cooker French onion soup. That’s right, the whole thing is made in a slow cooker and takes almost no effort to get restaurant quality soup –and I can say that because I own a restaurant. I like to start this recipe before I go to bed – let the onions caramelize overnight and then add the beef broth when I wake up in the morning. That way by the time I’m home from work (at least when I’m not working the dinner shift) all I have to do it ladle the finished soup into ovenproof bowls, top them with some toasted crusty bread and grated gruyere cheese, and pop them in the broiler. It’s a great recipe to make for a Friday night dinner party, or, on the weekends when we entertain friends all day and don’t want to worry about making dinner. This super simple recipe is sure to wow and please a crowd.
ALSO, don’t toss those leftovers; save them for a slow braise later on in the week.
SLOW COOKER FRENCH ONION SOUP
serves 4-6
INGREDIENTS
6 spanish onions, sliced
1 32 oz package of Pacific Organic Beef Broth
Salt and Pepper to taste
1 loaf of crusty bread
1 tsp olive
8-10 oz of grated Gruyere Cheese
SLOW COOKER or CROCK POT
PREP
1. Set your slow cooker on low, throw in sliced onions and cover. Let sit 6-8 hours, until onions are caramelized.
2. Once onions are fully caramelized, stir and make sure you get any stuck on bits from the bottom. Don’t worry if some a little more browned that others. Add beef broth and cover. Continue to cook on low for 6-8 hours.
3. Once cooked salt and pepper to taste. Ladle into over proof bowls or ramekins. Cut bread in hearty pieces that nicely fit into your bowl – then lightly toast in a heavy bottom pan with a teaspoon of olive oil. Top soup with bread and the cover with grated cheese.
4. Pop into the broiler at high for 5-7 minutes, until cheese is melted and bubbly and tinged brown.
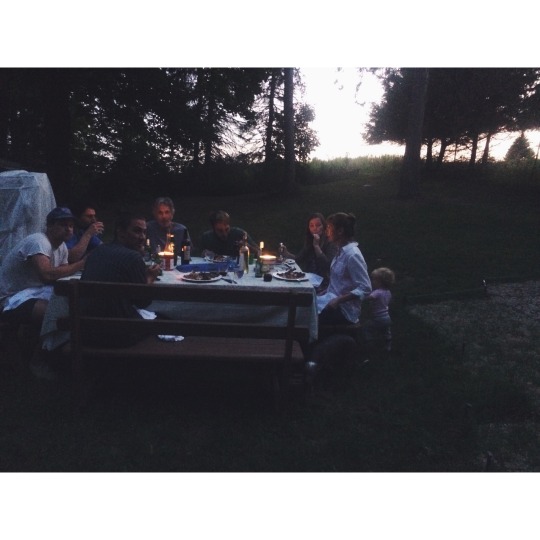
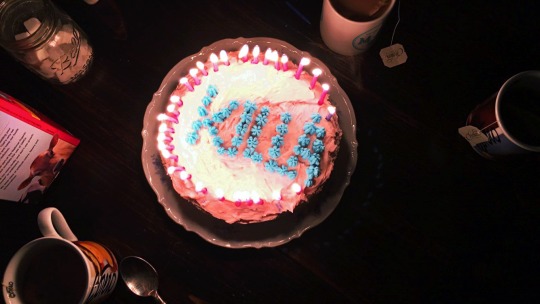
The week before last was Calvin’s birthday and for the first time in three years we actually got to spend it together! I wanted to do something special but since we live three hours away from all of our friends back in NYC a party party really wasn’t an option. Besides I’ve thrown Calvin a party party before. For his 25th birthday I organized a bowling party at my favorite bowling ally/dive bar in Brooklyn, The Gutter. (Fun fact – Calvin was on the bowling team in high school and is the only person in Oberlin history to skip Bowling 101 and go straight to Bowling 202. He’s that good.) I invited all our friends, made shirts for everyone that said “I Lurve Calio” (including a special crop top version for myself) and a tank top for him that said “CALIO!” on the front and “THE BIG 25” on the back. Bowling was followed by an epic dance party at my old party apartment plus a keg of beer brewed specially for his birthday. I’m pretty good at parties.
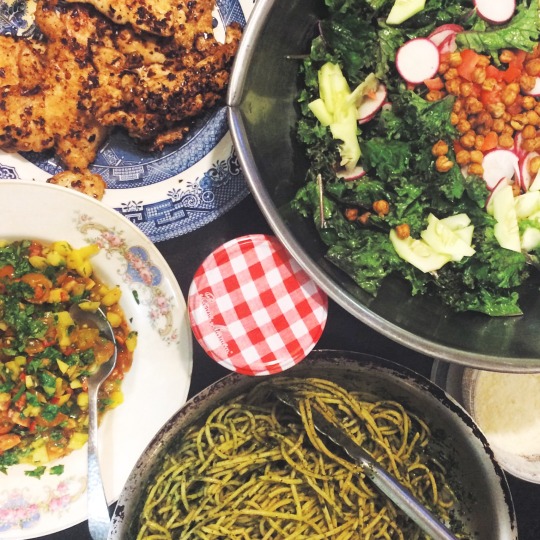
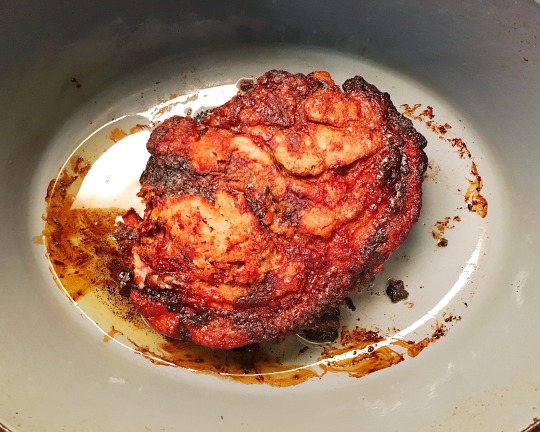
Now that we’re old country folk, doing something special means preparing a dinner party – a dinner party FEAST composed of recipes by professional chefs and my favorite blogs.! Today instead of posting my own recipe I want to share ALL the recipes I made for Calvin’s birthday dinner – every single one of which I have made on many occasions and are always a hit! If you follow me on Instagram (which if you don’t, you probably should) you know I make a lot of Asian-inspired meals and these are some of my favorite gringa-Asian (my own term) recipes. For the main course, I decided I would prepare the Momofuku style Bo Ssam pork butt that you may remember from one my very first blog posts (!) plus so many fixings. Below is the full menu with all the links and descriptions, in case your inclined to make them yourself! Plus, obvi, some photos!
Momofuku Bo Ssam Pork– is pork butt that has been dry brined in a salt/sugar/brown sugar rub over night, slow roasted until pull apart tender then served with white rice, bibb lettuce, a ridiculously tasty ginger-scallion sauce AND a spicy Korean vinegar hot sauce. Full disclosure – I am not the biggest fan of the ssamjang soy bean paste the hot sauce calls for – it’s hard to find and use up- so I forgo-ed it this time and substituted a tablespoon of brown sugar to balance out the heat in the sauce. Once all your Bo Ssam fixings are ready you take your lettuce, fill with a spoonful of rice and a heap of pulled pork covered in both sauces – it’s sweet ,salty, spicy and fresh all at once. If you make this you’ll be sure to win the dinner party!
Jean-Gorge Ginger Fried Rice – I have not been lucky enough to dine at Jean Gorge and try this dish myself but Mark Bittman published this recipe almost a decade ago on NYTIMES and it’s been one of my favorites ever since. Super simple recipe, the only thing I change is when making for a crowd I’ll scramble 4 eggs into the rice instead of topping with a fried egg. I also add a dash or two more of sesame oil because I have a thing for sesame oil.
Sriracha Garlic Roasted Broccoli – this recipe is from one of my favorite food blogs, Food52, and is a staple in my kitchen. I make it for Asian inspired grain bowls or as a side for Korean fried chicken night. It’s super simple and crazy tasty. Plus you can make it spicier if you prefer just by adding extra sriracha.
Cold Rice Noodle Salad– another gem from Food52, I made this dish to help satisfy the vegetarian that joined us for dinner. You can use pad Thai style noodles as recommended in the recipe but it’s just as good with vermicelli rice noodles. I personally prefer using only cilantro in my salad but if you want to add all the herbs go for it! This is a great dish for a dinner party on it’s own!
Green Salad with Carrot-Ginger Dressing– the most important part of this salad is the dressing! The recipe comes from my fellow Fieldston alumna’s blog, Feed Me Pheobe, it tastes just like the carrot-ginger dressing you love at sushi restaurants and is actually super healthy! I make this dressing all the time and keep it in the fridge – it goes well with any green salad!
Kimchi – the ONLY thing on the table I didn’t make! I’ve heard it’s super easy to make yourself though *warning* it can stink up your fridge. It’s a necessary condiment when serving any Korean inspired meal – extra points if you serve more than one type! My favorite brand is Sunja’s Medium Spicy Kimchi– it’s not too hot so great for us gringos!
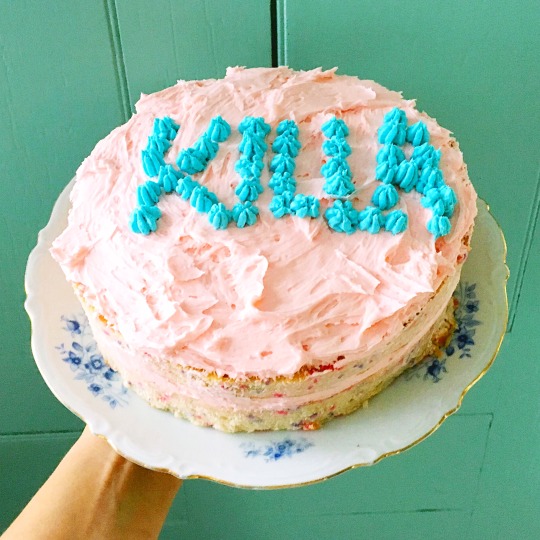
Funfetti Cake– yes that is right I made funfetti cake FROM SCRATCH! This recipe is from one of my favorite bloggers Molly Yeh I’ve wanted to make it for years but just never found the right occasion to put in all the work. I mean, boxed funfetti cake is so delicious and easy but you know, pretty much processed food poison. I usually make Calvin his favorite strawberry short cake for his birthday but this year I decided to make both! Then got so wrapped up in the funfetti I never got around to the strawberry short cake… TG the funfetti was deliciousness enough to make up for it (though I still owe you a strawberry short cake, Calio). I made a naked cake (frosted on the top and middle but not the sides) because I do not have the proper cake decorating tools (offset spatula, cake stand, lazy susan, etc…) to execute a perfect full on frosting. I lightly colored the frosting pink and tried my hand and basic lettering with a $5 pastry bag from the IGA. I also trimmed off the edges of the cake once it was assembled to reveal the sprinkles inside. It wasn’t the prettiest cake ever but it was the yummiest and I’ll definitely be making this recipe again for all birthday occasions!
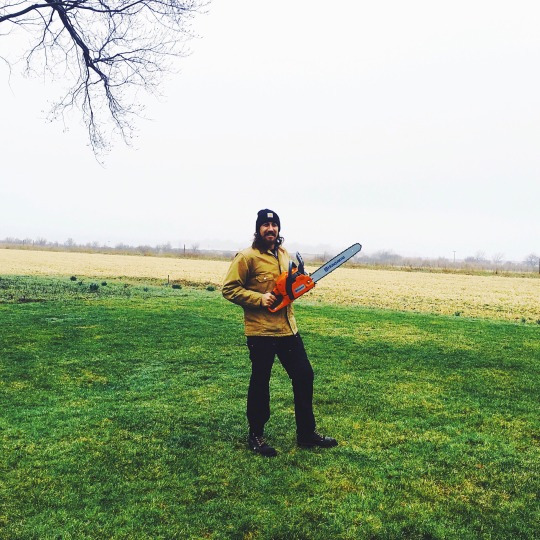
Plus, I finally got Calvin the chainsaw he’s been asking for and have room for now that we’re out of Brooklyn and at the farm! All in all it was a successful and delicious birthday! Pictures below!
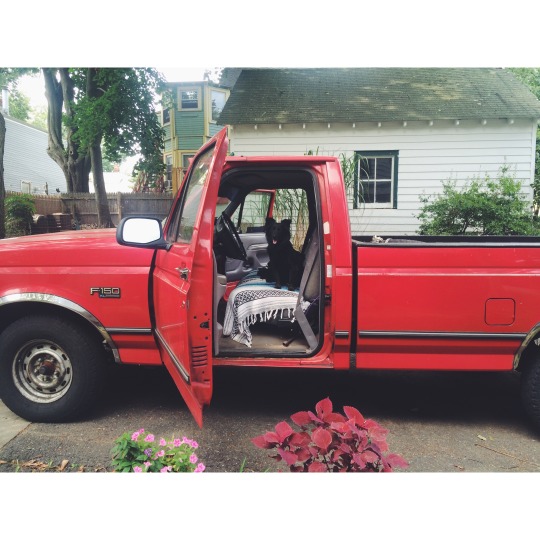
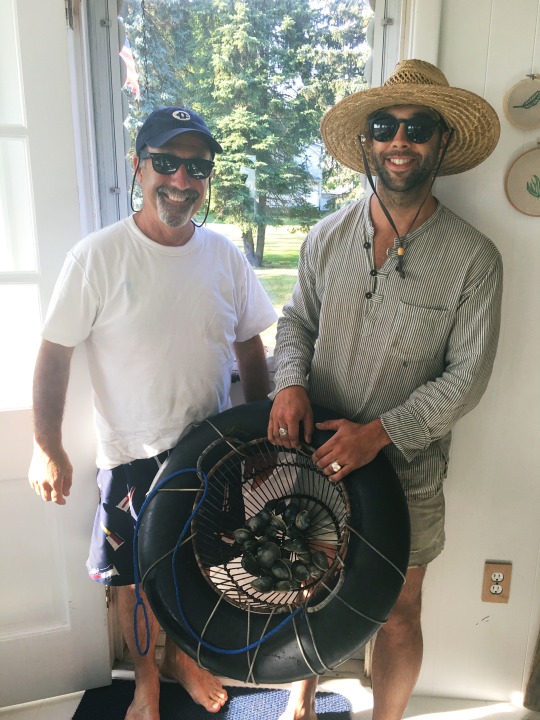
Well kind of. The boyfriend, who will now be known by his Christian name, Calvin, moved to a farm on the east end of Long Island. I’m splitting my time between the farm and my parent’s place on the Upper West Side so I can run the restaurant five days a week. This isn’t a “We Bought a Zoo” situation (full disclosure, I’ve never seen that movie, but I’m assuming the plot is Matt Damon buys a zoo even though he has no experience running a zoo) – Calvin farmed for five plus years before moving to the city three years ago when I opened the restaurant. We even lived on a farm the summer of 2012 when Calvin was farming in Amagansett. After over three full time years in the city Calvin was offered a job managing an organic vegetable farm out in Southold — pretty much at the end of Long Island on the North Fork (not the South Fork which is the Hamptons)(the North Fork is way chiller)(it’s also wine country!) and he couldn’t be happier to be doing what he loves.
SO Calvin’s out on the farm full time with Misses Loretta the dog who is also doing what she loves – running around in open fields all day herding sticks. It’s a brand spanking new farm so he gets to start from scratch – planting, buying animals, setting up barns. You really need to lay all the ground work for the growing season early in the winter so even though they haven’t started growing anything yet (animal or vegetable) he has his work cut out for him cleaning out barns, building chicken coops and deciding what they’re going to plant and when. Eventually, he’ll have a full blown farm stand and sell at market but for now there’s lots of prep to be done!
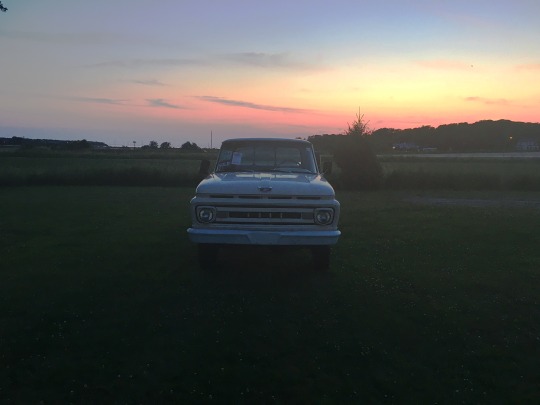
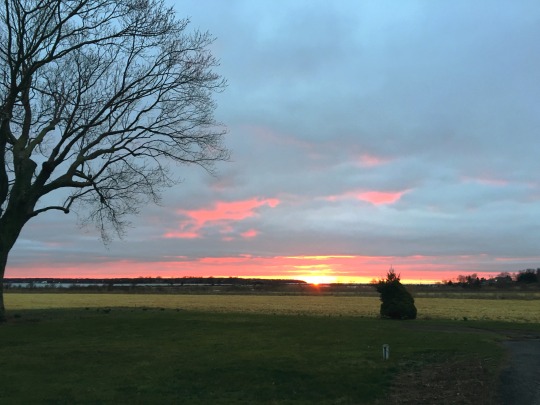
What do I do when Calvin’s at the farm all day? If you know me at all you know I’m not helping. I’ve tried working on the farm a couple of times and I don’t last long. I liken my experience farming to some of the worst school field trips I’ve been on – too cold, too hot, and plain old boring. But just because I’m no help on the farm itself doesn’t mean I’m no help at all! Once after a particularly frusterating day mulching garlic in Amagansett (mulching pretty much means throwing dead leaves on dirt) I gave up after about 20 minutes on a cold windy day, went back home and showed everyone up with two homemade challahs made from fresh farm eggs. I’m clearly much better at cooking the vegetables than growing them! And home cooked meals are always welcome on the farm or anywhere really. So I’m spending my off days on the farm cooking elaborate meals, blogging (!), teaching myself how to drive Calvin’s stick shift (and stalling a lot) and spending hours embroidering. It’s kind of awesome. It’s like I finally have the country house I always wanted! Plus the views from our house are RIDICULOUS. You guys should all come visit just to watch the sunset!
I’ll be posting updates of the farm’s progress from now on! Along with recipes I’ll be making based on seasonal vegetables Calvin will be growing from the farm. Today I’m sharing the very first meal I made at the farm — my Papa’s garlic rosemary roasted chicken, Italian Sausages and potatoes. It is an INCREDIBLE and easy one pan dish (just realized I’m posting two one pot meals in a row but whatevs). This recipe is also great for these last cold winter nights and equally enjoyable in warmer months. It’s great for a crowd but also holds up well if you make it for two and eat the rest as leftovers. I can’t wait to make it again with potatoes, garlic, rosemary and chickens all grown of the farm!
Even though my father has owned restaurants my entire life he almost never cooked. I’m pretty sure I’ve seen him cook three things – once he made me chicken soup when I was sick at home, once he had a date and he told me he was making her steak (I only saw the raw steaks, not the finished product) and this chicken dish which he has made for me over and over and I love every time. I first started making it on my own in college when I was a head cook at my co-op Tuesday nights — it feeds a lot of people and somehow the chicken always stays super moist and tender. It’s almost a full proof recipe! The real trick is to over stuff the pan and get a good 1/4 inch of olive oil on the bottom. The only time I’ve ever messed this recipe up was when I made it on a cookie sheet instead of the baking pan – all the ingredients were too spread out and wound up dry and over cooked. You need the potatoes, chicken and sausage to be crowded together to create the ideal moisture to crispyness ratio. Don’t skip the extra step of browning the sausages before you bake – it gives them that extra oomf of flavor and texture. And make sure you nestle the sausage and chicken next to each other next to each other for optimal flavor enhancement. Now here’s what you’ll need!
PAPA JOE’S ROASTED GARLIC ROSEMARY CHICKEN AND POTATOES
Serves 6
INGREDIENTS
4 white thing fleshed potatoes – peeled and cut into 1 1/2 inch pieces
1 whole head garlic (we’re not kidding around here) – minced
6 chicken thighs – bone in!
1 lbs sweet or spicy Italian sausage – up to you
10-12 sprigs of FRESH rosemary – removed from stems and roughly chopped it should be about 1/4 cup
A LOT of olive oil – at least 1/3 to generously cover all ingredients and leave a 1/2 inch on the bottom on the pan while cooking
salt and pepper
1. preheat oven to 400 degrees
2. in a 9″x13″ baking dish (or around there – you can use a smaller baking dish but not a larger one. remember you want to crowd your ingredients in the pan) throw in chopped potatoes, half of the chopped rosemary, garlic and chicken and cover with olive oil so all ingredients are coated then add salt and pepper. Roughly mix ingredients together so chicken and potatoes are evenly covered in garlic, oil, rosemary salt and pepper. Set aside.
3. Heat 1 tbs of olive oil in a medium sized pan. Once hot brown the sausages on both sides -about one minute each- but do not cook through! You will be cooking the sausages along with chicken and potatoes so if cooked through on the pan they will get dry! Remove from heat and let cool till you can handle.
4. Once cooled but sausages into 4″ pieces and arrange with chicken and potatoes. You want all the ingredients to be touching! I find it easiest to spread out the potatoes, nestle the chicken and then squeeze sausages between the chicken and potatoes.
5. cover with more olive oil and salt and pepper and the remaining rosemary. Once again, you want there to be about a 1/2 inch pool of olive oil on the bottom of the pan – this helps keep the chicken moist while making the potatoes crispy and turns in tot he most delectable sauce once everything is good and baked.
6. bake for one hour – you want your chicken to be cooked through, juices running clear, with crispy skin. potatoes should be brown and crispy on the outside but fork tender on the inside.
7. served everyone a good portion of potatoes, one chicken thigh and at least one sausage! cover with oil sauce from the bottom of the pan and serve with crusty bread – you’re gonna wanna do some dipping!
I’ve never been very good at keeping resolutions. One year for New Year’s not so long ago I decided to give up my bottled water habit – I have a thing for Evian – it just tastes better – but I knew bottled water was bad for both the environment and my wallet. I was so proud of this decision I flaunted my resolve to my friends and roommates, bragging how easy it would be, how much money I would save. By January 8th I’d totally caved, walked around the corner to Hana Food and indulged in a $3 bottle of water. When a roommate came home and caught me in bed with that tall drink of water, I humbly confessed, “I gave up.”
This year (of my birth, not the calendar), instead of setting resolutions I set goals. I realize that benchmarks are a more feasible alternative to my ambitious and perhaps unrealistic resolutions. But if you read my last post (from SIX MONTHS ago) you probably noticed that I have set A LOT of goals. Eating better, working out, writing more, traveling, success! I mean, I know I had a whole year ahead of me but I also have much I need to accomplish. I must say I’ve done pretty okay on some of my goals. Six months into my twenty-eighth year (okay, technically it’s my twenty-ninth) year I thought this would be a good time to evaluate my progress and finally update my blog. First and foremost, I GOT MY FUCKING DRIVERS’ LICENSE – something I’ve been putting off for 12ish years (I mean, I am a New Yorker, crazy good at the subway and a top-notch passenger), but an adult needs driver’s. Now I just need to master stick shift… I also renewed my passport, which will help me attain future goals! I’ve already pampered myself with a two-week vacation in Hawaii (travel blog-post coming soon) AND a trip to Uruguay (blog posts about both coming soon!). I’ve reshuffled my restaurant staff and have been booking parties left and right. At one point I was working out daily, though recently my work out schedule has dwindled, but hey, that’s way better than my exercise commitment over the past few years, which was never.
Going forward I plan to focus more on my blog and my diet. So here I go blogging about my eating habits AND sharing a super cozy recipe for the last cold nights of winter! Cold grey weather almost guarantees poor diet choices. The homemade pastas at my restaurant have been beckoning me with their delicious sauces and fresh meats and vegetables. I’ve also imbibed a fair amount of booze. But over the past few months I have to remind myself that I don’t have to be perfect. Everything in moderation is my mantra now; not exactly the Party Girl Plan, more like the Party Girl Plan Lite (but still pretty heavy). If I want to have gnocchi for lunch I’ll have a salad for dinner, not only because salad is the healthy choice but also because I know those greens will help my body digest the gnocchi, and TBH I really like salad. Smoothies in the morning instead of bagels. Dessert once (or twice) a week instead of every night and usually homemade. And for good measure, I’ll throw in a Pilates class here and there. It’s sweater season and I’m feeling good about myself and so should you!
In honor of the cooler weather and my dabbling with indulgence today I’m sharing the recipe for my mom’s Shepard’s Pie. I know, with a name like Isabella Gambuto you’d think I’m 100% Guido, but alas that conclusion is flawed. My mother is Jewish, of South African and English decent. My Grandmother Patricia is a very proper Londoner (accent, marmite, Sainsbury’s Red Label tea, keep calm and carry on and all that). This recipe is my mom’s version of one of her grandmother’s signature dishes. Though classically made with lamb, mom now makes hers with ground turkey and the rest of us make it with ground beef, which in the UK they call Cottage Pie. But this one is my recipe and I’m going to call it what I damn well please! Caramelized onions and seasoned ground beef, topped with layers of peas, roasted sweet potatoes and creamy mashed potatoes, all covered with grated sharp cheddar and baked in the oven. It’s the perfect one pot meal, great for a crowd or family dinner. Preparation is a little time consuming but totally worth the effort. It’s also even better the next day! I mean, I’m pretty sure this recipe could win a Shepard’s/Cottage Pie competition, if such thing existed…
SHEPARD’S aka COTTAGE PIE
Shepard’s pie is pretty much an entire meal – meat, potatoes and veggies – stacked into one delicious casserole. I apologize for the so-so photo – I made a super fun GIF of all the layers but an too computer illiterate to figure out how to post it on wordpress (help?!).
Serving size: 8-10 people. This is a good dinner party dish!
INGREDIENTS
2 LBS ground beef
1 large Spanish onion, chopped
2 tbs olive oil
1 beef boullian
1 cup water
3 large sweet potatoes
4 large potatoes
1/4 cup butter (1/2 stick)(I know, a lot of butter)
1/4 cup heavy cream (yea, I never said this was particularly healthy)
1 bag frozen peas
1/2 cup sharp cheese of your choice SHREDDED (I used a mix of parmesan and white cheddar)
peel potatoes and chop fourths. place in a medium pot and cover with water and bring to a boil. once water has boiled uncover pot and lower heat to a simmer and let cook until fork tender, about 15 minutes. once cooked, drain water and mash with butter and cream. salt and pepper to taste.
while potatoes are boiling prick your sweet potatoes with a fork two or three times each and place on a tin foil lined baking sheet. put in over and heat to 425 degrees feranheit. bake for 30-45 minutes, until fork tender. once cooked, scoop out roasted potatoes and discard skins, salt and pepper to taste.
while your sweet potatoes are roasting heat a large pan with olive oil and brown ground beef. make sure to drain any liquid released from beef from the pan – do this by covering your pan and carefully pouring out excess liquid into a bowl. you can discard this excess liquid
once meat is nice and browned set removed from pan and set aside. add onions into same pan and sauté, making sure to pick up any little bits of beef stuck to the pan (that’s flavor baby!) you may need to add another glug or two of olive oil here. cook until tender and sweet about 10 minutes. Remove from oven and turn down heat to 400 degrees farenheit.
add meat back in with onions, throw in beef boullian cube and cover with water. let cook until water is fully reduce and taste. if too salty or too dry add another 1/2 cup of water and let reduce again. salt and pepper to taste.
the final step before layering your pie is to defrost your frozen peas! this can be done in the microwave, a steamer or a shallow pan filled with 1/2 inch water. just make sure to drain any excess liquid post defrosting!
at this point you should have all five (YES FIVE) components of your pie ready and waiting! In your heavy bottom pan layer your ingredients in this order: : beef and onions, peas, sweet potatoes, mashed potatoes. Make sure you are evenly spreading the sweet and mashed potatoes.
once put together it’s time for your final finishing touch: CHEESE! sprinkle the cheese of your choice all over the top. also feel free to add a couple pats of butter if you’re feeling crazy!
once fully assembled place pie uncovered into oven (which should still be heated from your roasting) and cook uncovered for 20-30 minutes, until cheese is melted and the top is lightly browned. Let cool at least five minutes and then dig in!
***Optional eating advice — I like the mash my pie all together, unto a big ugly mess, that way you get a bit of beef, peas, sweet and mashed potatoes in every bite! But that’s just a suggestion!
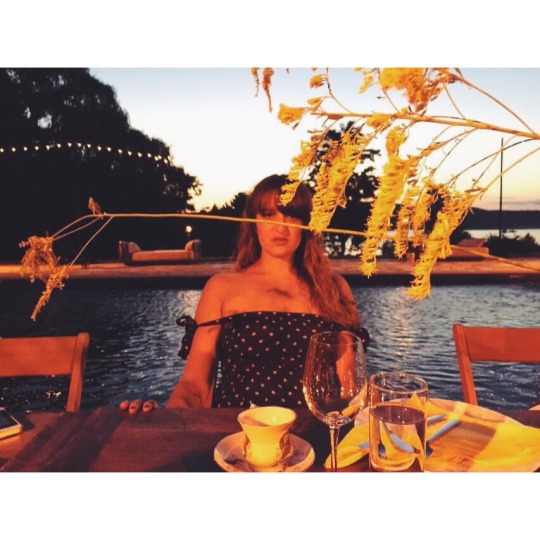
And now a smattering of photos from the last half year of my life just because!
I turned twenty-eight this month. I’m now officially in my late twenties (even though twenty-seven totally qualifies as late twenties) so it’s time to get my shit together. On September 5th, my actual birthday, I wrote an Instagram post (you should probably follow me) listing all the goals I want to accomplish in the coming year and asked my friends and (handful of random) followers to help to keep me focused.
Here, once again, is the long-winded birthday message I posted on the gram:
“Hey world! Today I turn 28 and here are some things I’d like to accomplish in the coming year. I want to remain healthy, for my business to continue to profit and then some, to write/blog more frequently (at least once a week), to grow my blog/etsy/instagram/general social media presence, to write a cook book (okay maybe more of a long term goal), to commit myself to eating a balanced diet and an overall healthy lifestyle, to work out at least four days a week but aim for six, to go some place I’ve never been before, particularly abroad, to face my fears, to love, be loved and be happy.”
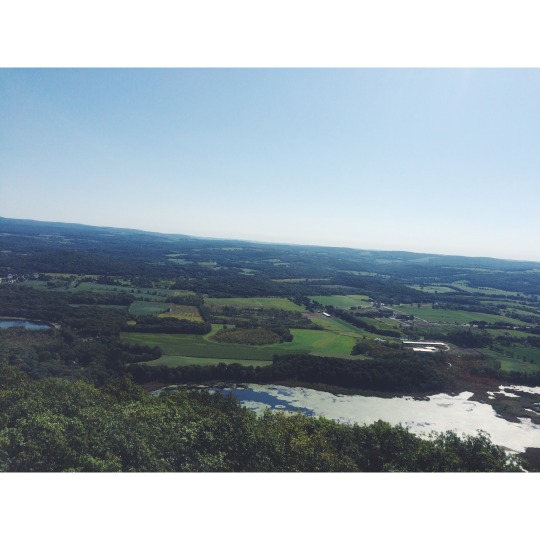
It’s been two plus weeks and I haven’t exactly hit the ground running towards accomplishing these goals. But hey, it’s a marathon not a sprint! In the past three weeks I’ve moved from Brooklyn to Manhattan, attended two destination weddings, gone through a torrent of emotional turmoil (which I’m not going to share with you because bloggers need keep some things private, right?), and sneaking a lot of crappy food. On top of that I haven’t worked on an embroidery project in over a month, which may have something to do with the fact that my life is in boxes. On the plus side I HAVE joined Class Pass (which is awesome) and started taking Pilates, yoga and barre classes frequently, though I’ve yet to meet my 4X/week goal. Maybe that will happen this week? I remain optimistic. I went on a super hard hike on my birthday and climbed an eight story (maybe I’m exaggerating) moon tower even though I’m completely afraid of heights. I already faced a fear! I have managed, on most days, to have a smoothie and/or a salad for at least one if not two of my meals. I have also booked several parties and special events at my restaurant that will definitely bring in extra revenue and more than likely a new batch of returning slash regular customers.
And I even very impromptu-ly (I know that’s not a word and I don’t care Mom) bought tickets to Hawaii for TWO WEEKS! I can’t remember the last time I went anywhere for two whole weeks, let alone paradise! If you’ve spoken to me at all in the past three months you’d have heard that Hawaii’s been calling my name; so many omens have crossed my winding path, omens pointing to the far west. (mostly, I got really into the Hawaii Five-O reboot on Netflix.) Even though I’ve been to Hawaii before, twice, I haven’t been Oahu, aka Hawaii Five-O Land, and because I’ve always wanted to go there it still counts as a place I’ve never been. And hey, I will have visited Hawaii AND Alaska in one year! That’s pretty cool.
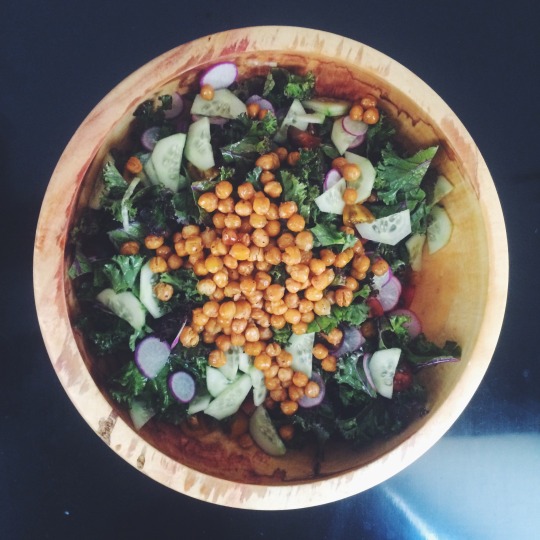
So yea, I’m chugging along at my own pace trying to become the best version of myself. And part of that is eating right! Today I’m sharing a recipe for a healthy, filling and crazy delicious massaged kale salad. This recipe is based on the kale salad I had in Miami at 27, the restaurant inside the very hip (I hate using that word, but actually) Freehand Hostel, which is not actually a hostel, more like a fancy hotel with bunk beds. My friends and I were all little wary of ordering yet another kale salad but the miso-tahini dressing really piqued our interest so we ordered one for the table.
Oh boy did we make the right decision! The vigor of the kale harmonized beautifully with the crunch of the chickpeas and radishes, and the addictive delicious dressing made this a perfect salad. I’m pretty sure I licked the bowl. As soon as I got home I tried to recreate it, added some extra veggies, took away the fennel (not that I don’t LOVE fennel), and I gotta say, I think my version is just as good, if not better.
MASSAGED KALE SALAD WITH ROASTED CHICKPEAS, RADISHES, GRAPE TOMATOES AND CUCUMBERS IN A MISO-TAHINI DRESSING
There are a lot of steps to this salad and I wanted to make a couple of notes on the prep. First, make sure you properly massage the kale – the last time I made the salad I rushed my massaging because my mama had to get to an appointment – and without the deep massage the kale was too fibrous and the salad fell a little flat. Second, the salty roasted chickpeas provide an alternative for the crouton crunch factor. After roasting the chickpeas make sure to use them while they’re still hot, as they’re crunchiest right out of the oven. After about thirty minutes or so they get a little chewier, still tasty, but for this recipe it’s all about the crunch. Next, though the recipe calls for half a can of chickpeas I like to roast them all and save the other half for a healthy snack. Finally, I’ve added one small hack for the dressing; the original recipe calls for tahini, a thick paste made of ground sesame seeds. In its place I use the tahini-based Annie’s Goddess dressing, which is much easier to work with and store than pure tahini and provides the same flavor.
Between the massaging, chopping, mixing the homemade dressing and roasting the chickpeas, this salad takes time – and timing – to prepare, but it’s so totally worth it. It’s robust enough for a filling lunch, or serve it as a colorful, crunchy accompaniment for chicken paillard or grilled steak and tada! you have a full on meal.
Serving size: Full meal for 2, side dish for 4-6.
Ingredients:
DRESSING
1/3 Cup Annie’s Goddess Dressing
1 tablespoon white miso
1 tablespoon lemon juice
1/4 cup warm water
salt and pepper
PREP
***A jar with a lid or better yet a mini mixer like a magic bullet or small Cuisinart will make preparation a lot easier. If you lack both, some strong whisking will do the trick
1. in a small bowl mix together the warm water and miso paste until the miso is dissolved. add into a jar (or whatever you may have) with lemon juice, and goddess dressing and shake until emulsified
2. add salt and pepper to taste
SALAD INGREDIENTS
Kale (I like Russian curly kale, you can use whichever kale you prefer or find at the market)
1/2 15 oz can Chickpeas
1/2 cucumber, peeled and chopped
3 radishes, chopped
1/2 cup cherry, grape or sun gold tomatoes, sliced in half
olive oil
salt and pepper
CHICKPEAS
1. pre heat oven to 400° F
2. rinse chickpeas and thoroughly dry them with a kitchen clothe, until dry to the touch (this will take a little while)***they won’t get crunchy if they aren’t completely dry
3. place chickpeas on a cookie sheet and smother with olive oil and a generous helping of salt. iodized or kosher works best.
4. cook for 25-30 minutes until gold brown and crunchy
THE REST
1. first things first you gotta massage that kale! there are hundreds of great instructions on the internet, here’s a good one. make sure you work it hard! remove the ribs of the leaves and rip into bite size pieces
2. add chopped radishes, cucumbers and tomatoes
3. throw in hot crunchy chick peas
4. dress to your liking (I ilke a lot of dressing) but try adding half of the dressing, mix and taste to see if you need more.
5. add GOOD flaky sea salt and freshly ground pepper and ENJOY!
The hardest part about blogging is to continue to keep blogging. Owning my own restaurant, starting a fledgeling Esty business (future post about this soon!), and what I like to think of as, you know, a life, I don’t find much time to write new posts. Also, as the boyfriend always reminds me, I’m lazy. I often spend my one day off a week snuggling with my puppy, watching bad television (in particular USA shows “characters welcome!”), trying to recharge for the coming week. It’s not like I haven’t thought about blogging, I have several to-do lists and notes on future blog posts that I just never crossed off. So it’s time to stop writing about to-dos and just do!
I really like blogging, not just to share but also to document my experiences and interests! My future self loves going back- remembering the fun times, good food and (what I hope are) pretty pictures. I have a couple of recent trips (New Orleans, Miami) I can’t wait to post about as well as several weddings and adventures (ALASKA) coming up! Future me would totally be missing out if I didn’t write about these experiences and I hope future you guys will like them too!
Much like blogging, the hardest part about eating healthy is to continue to eat healthy. I don’t really want to get too into my health issues in this post, but now that it’s been over 5 months (!) since my surgery, I haven’t been the best at sticking to the Party Girl Plan. Vacations, especially those to food destinations like NOLA, really take a toll on my eating habits (YOU ONLY LIVE ONCE). Moreover, SUMMER, takes a toll on eating habits! All I want is hot dogs, pizza, cheese fries (though I have yet to eat any) and ice cream! Even with the (more) occasional cheat, I try to keep my regular diet on the healthier side. Lots of juices and non-dairy smoothies, lots of veggies and humanly raised meat. Yes it is somewhat expensive to eat this way, but I put my money where my mouth is, and my tummy and I are happier because of it.
Today I’m sharing a recipe for my go-to healthy slaw! I’ve been eating a lot of grain bowls recently – usually brown rice or quinoa topped with lots of veggies and a marinated protein. I often make these gringa-Asian inspired, with sriracha roasted broccoli, garlic soy bok choy and edamame. I will make a sesame-miso-ginger dressing to top it all off but in this hot weather, if I’m in the mood for something lighter, this slaw is the perfect condiment. It also makes a great side salad. It’s tangy, crispy and super refreshing. I’ve made it dozens of times and it never fails to please!
Gringa-Asian Cucumber, Carrot and Bell Pepper Slaw
It has officially been two months since my surgery! The swelling and intense pain are almost entirely gone – I still have cramps and the occasional bad day if I push my body too hard. My surgeon says the procedure went flawlessly. He removed all the lesions, but, like cancer, endometriosis cannot be cured. Without treatment I’m succeptible to a relapse at any time. Because hormone therapy is the only medical option to stop the disease from coming back I just went through some tough decisions that I’m going to discuss on the blog today.
My surgeon recommended another hormonal IUD. This option involves the least amount of hormones because it is centralized right where the disease occurs. As I briefly discussed in my last endometriosis post – having the previous IUD inserted was the most painful experience of my life, arguably worse than the surgery itself. I was not keen on going through that again. But it was better than the other options. Hormone replacement pills (not birth control pills) would mean three times as many hormones and would almost definitely make me gain weight (way to play my vanity card, Doctor!). Hormone shots or a progesterone implant were too permanent – I couldn’t remove either if my body didn’t react well to the dosage. My surgeon was super gung-ho about the Mirena IUD and explained that my last one was situated low in my uterus and was rubbing against all the endometrial scar tissue that just happened to be clustered in the same place. This was why not only the insertion process but the entire month with the IUD were so incredibly painful. He guaranteed an easier sonogram-assisted insertion this time so he could actually see that it was in the right part of my uterus. I still wasn’t convinced.
The boyfriend grew up in a homeopathic home – no vaccines, no over-the-counter medicines- and he is one of the healthiest and strongest people I know. When deciding what my next steps should be in this healing process I turned to his parents, specifically his father, Theo, for advice. Theo is a massage therapist, juice enthusiast, reike master, and a genuinely awesome, extremely healthy man. When I was first diagnosed with endometriosis Theo found this homeopathic website forum for women with the disease. There were a handful of cases where women had completely cured themselves of the disease by going on a diet similar to the cancer diet (no meat, no legumes, no sugar, no alcohol, no fun), alongside a juicing, supplement and yoga regiment. While these stories were incredible and inspiring, to be honest, I didn’t know if I could give up one of my greatest loves – FOOD – to cure this disease. Many of the stories were from women with stage-four endometriosis, whose only option after numerous surgeries was a hysterectomy. I’m still in my 20s, I love meat, cheese, pastries and BOOZE. I knew I couldn’t follow a strict enough diet to actually cure my disease.
Then I spoke to a family friend, Halina, who is a gynecological-endocrinologist, i.e. a fertility doctor. I mentioned my interest in a homeopathic remedy. I told her I wanted to find the cause of my disease – stress, diet, lack of sleep, and she chortled. Endometriosis doesn’t have a root cause, she told me, I couldn’t cure it with diet and exercise alone. If I didn’t intervene soon with hormone therapy I ran a high risk of reoccurrence that would lead to more surgery and, even more frightening, a very real possibility of future infertility. My chat with Halina ultimately led to my decision to get another IUD, along with a new diet and lifestyle. My surgeon kept his promise about the second insertion; it wasn’t anywhere near as painful as the first. All I needed was one day off and a couple days in stretchy pants to recover. It’s been five weeks now and I’ve had some pain, (nothing compared to pre surgery cramps) and am hopeful for my future. Now I can focus on my new “diet” and general lifestyle changes!
When I was first trying to decide which healthy lifestyle path to take I looked at two popular diets – Paleo and the Whole 30. My bar manager, Megan, had been Paleo for a month, was feeling amazing and lost 13 lbs (which I didn’t even think she needed to loose). Another girlfriend of mine and one of my blogger crushes, Elsie from A Beautiful Mess, had similar experiences with the Whole 30 diet. Both intrigued me but neither would work for me as a sustainable eating plan. No condiments, dairy, whole grains, or alcohol ever?! I could do that for 30 days but what about the rest of my life? I wasn’t doing this to lose weight, I was doing this to get heathy. I had to find a way to eat well without depriving myself. And so I created my own diet plan pretty much based off Michael Pollan‘s book In Defense of Food whose motto is “Eat Food. Mostly Greens. Not Too Much. I’ve cut almost all processed foods from my diet – no flour, nothing from a box, only whole grains, little to no dairy (and mostly goats’ milk products)) and whenever possible organic/antibiotic free/free range. I allow myself organic condiments such as tamari/soy sauce, sesame oil, miso paste, vinegar, raw honey and maple syrup. Over the past two weeks I cut all carbs (just to see if I could) and it went extremely well – though I found myself missing quinoa and my Ezekial bread avocado toasts. I’ve still been drinking alcohol (almost always in moderation, minus a couple fun nights). I’ve cheated a couple time – at a friend’s engagement party I had a tiny little pig in a blanket or a bite of the boyfriend’s Philly cheese steak – but always small amounts and I have never felt guilty.
What I like about my non-diet diet plan, or if you will, The Party Girl Plan, is that it’s easy, sustainable, and allows me to continue eating foods I love. I don’t feel deprived, hungry and have almost entirely lost my cravings for rich foods and sugar! This coming from a girl who would eat a bowl of pasta and day and at least one package of sour candy in bed every night (with the boyfriend…) I feel healthier, stronger, and so far I’ve lost 10 LBS, plus my bowel movements are incredible! If you’re looking to change your diet, this is a great place to start.
In addition to eating well, I’ve started to move my body more. After lying in bed three months straight it feels so good to take walks and be on my feet. I’m not allowed to lift anything heavy or run yet so I’ve started practicing yoga, which I always thought I hated. BIG THANKS to my girlfriend Karla, who, along with our friend Ashley, runs Sync Studios, a Yoga and Cycling Studio in Williamsburg. Ashley has taken time out of her own busy schedule to do privates with me until I get my strength up. Hopefully in a few weeks I’ll be confident enough to take classes. And when I’m feeling super strong the boyfriend and I want to do Insanity (we’ll see if that actually happens!).
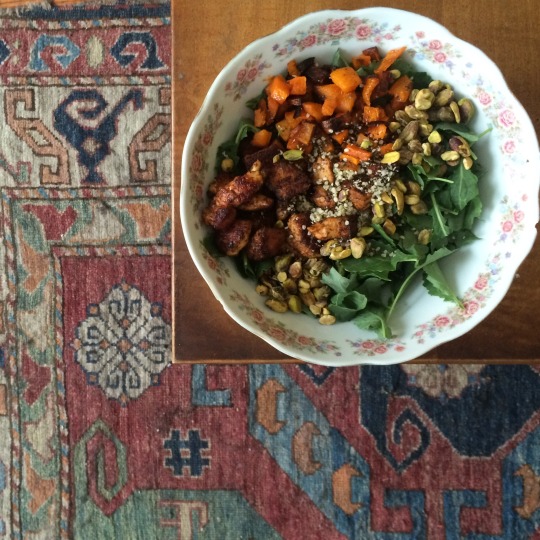
From now on I’m going to try and share recipes that are Party Girl Plan friendly! Below I’m sharing a recipe for a super filling chopped baby kale salad that has been a staple of mine these past two months. Feel free to switch out the butternut squash for any other type of squash or sweet potatoes – also if pistachios are a little too expensive (I steal them from my parents’ house)(Sorry parents!) pepitas work well too. And one last shout-out before I share; the chicken in the salad is inspired by a fellow Fieldston Alum/food blogger/healthy eater Pheobe Lapine, from Feed Me Pheobe. My good friend Lily turned me on to her blog and it has so many yummy healthy recipes (my favorite is her Carrot-Ginger dressing!) you should definitely check it out.
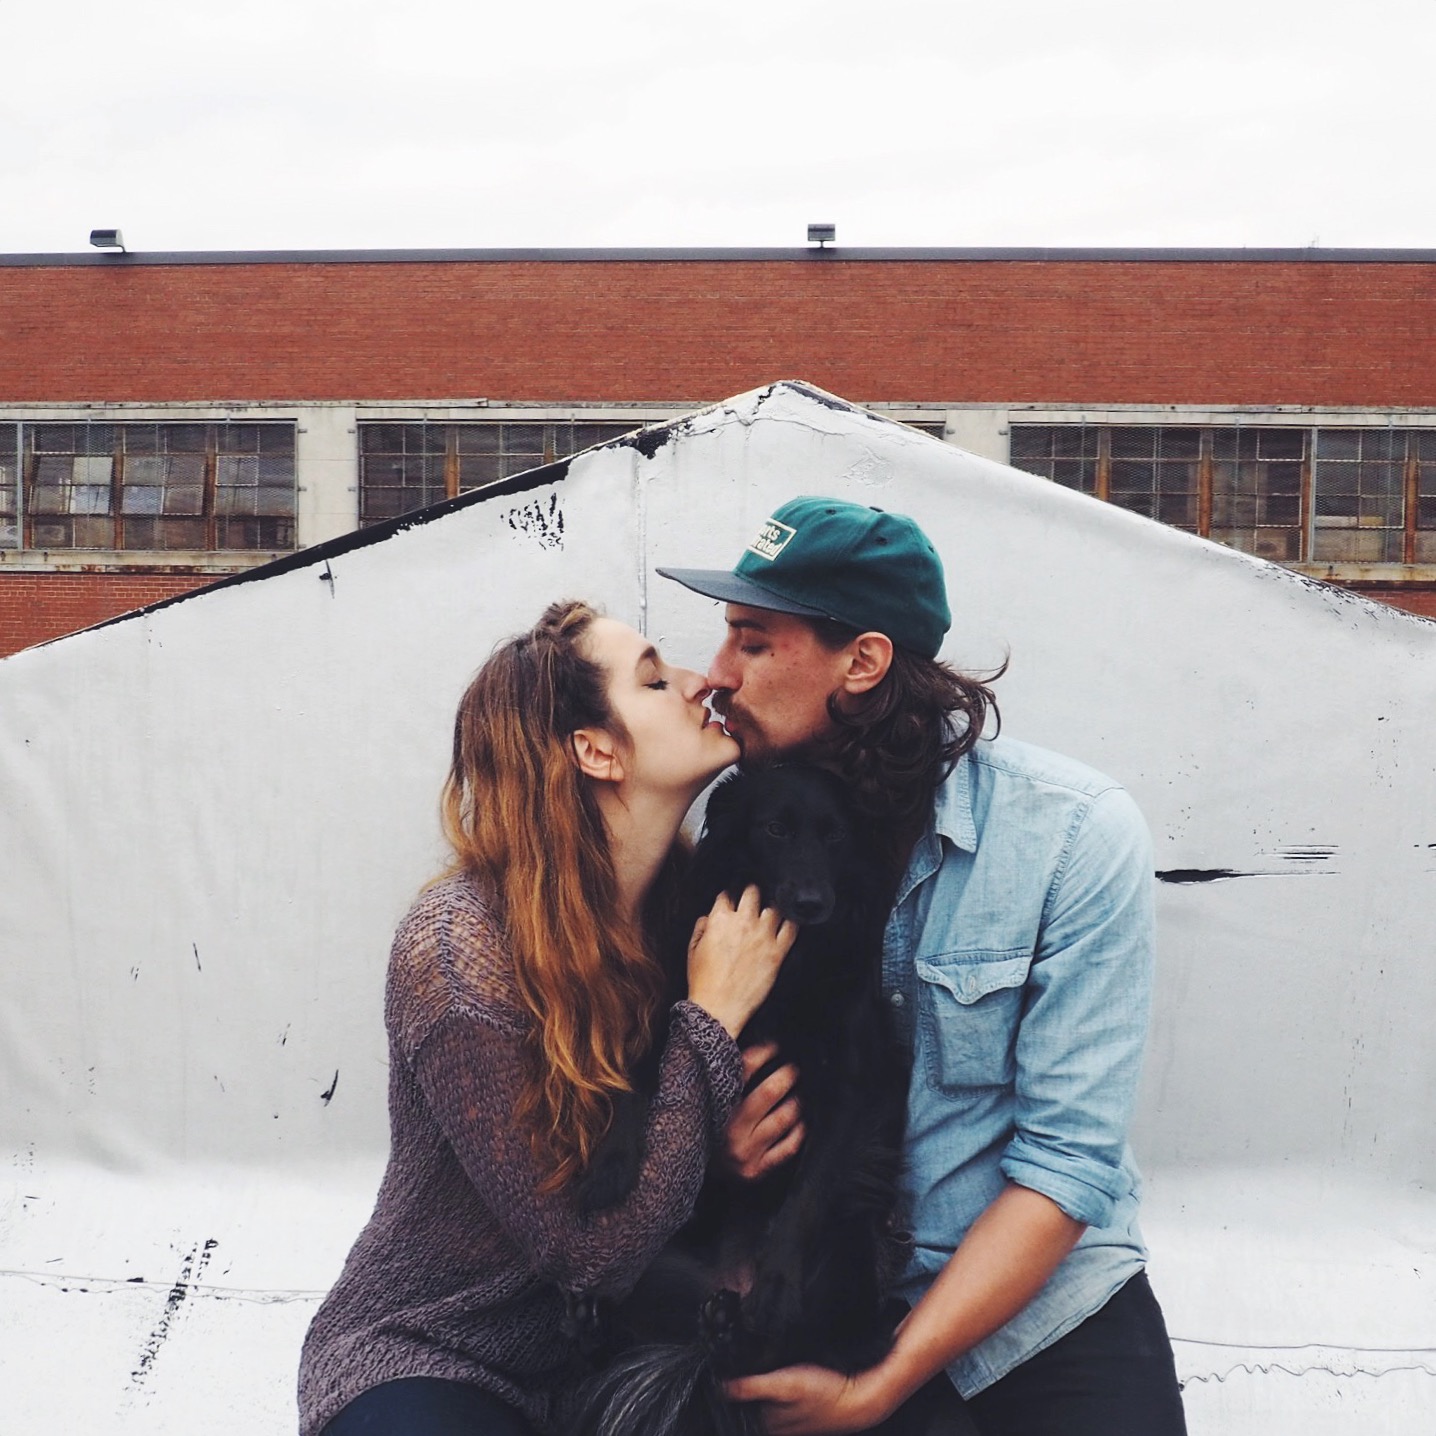
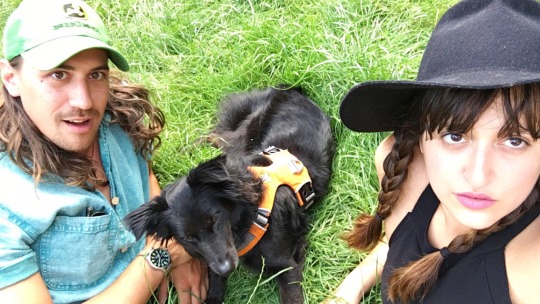
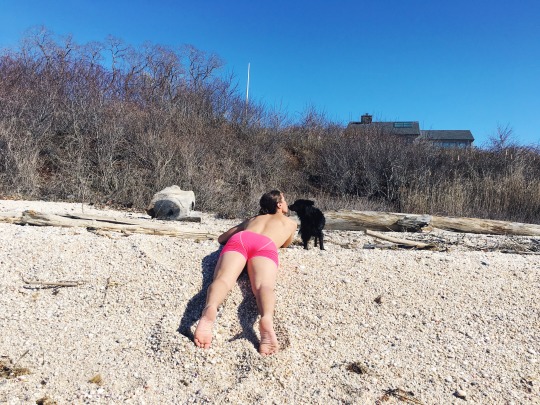
ALSO special thanks to the boyfriend for taking these fun photos of me and Misses Loretta the dog on his new camera I got him for his birthday. Clearly it was a present for both of us!
Chopped Baby Kale Salad with Chili-Cumin Chicken, Roasted Butternut Squash, Pistachios, Chia and Hemp seeds in a Miso-Maple-Balsamic Vinaigrette (What?!)
INGREDIENTS
For the Chicken:
1 chicken breast, chopped into bite size pieces
1 tsp chili powder
1 tsp cumin
1/2 tsp salt
tbs coconut oil
For the Salad:
about 2 cups baby kale
1/4 butter nut squash, roasted with olive oil, salt and pepper at 375° for 30 minutes
2 tbs pistachio nuts
1 tbs hemp seed
1 tbs chia seed
1 tsp really good flaky salt
For the dressing:
1 1/2 tbs melted coconut oil
2 tbs balsamic vinegar
1 small shallot, minced
1 tsp white miso
1 tsp maple syrup
PREP
1. cover chopped chicken in chili, cumin and salt and let sit for a couple of minutes. Heat pan and cover with coconut oil. Throw in spiced chicken and cook through, about 8 minutes, making sure you flip those little guys to get a nice brown on all sides.
2. while chicken is cooking make dressing, I recommend doing so in a jar, as it emulsifies the ingredients best. throw in shallot, oils, vinegar, miso, and maple syrup. shake vigorously and taste to make sure it’s just sweet enough!
3.to assemble salad- roughly chopped (I know, it’s already baby kale, but things taste better chopped, trust me), top with butternut squash, cooked chicken, pistachios, seeds and salt. drizzle over dressing (it’s rich you don’t need to much) ENJOY!
As many of you may have noticed (or at least my best friend Sarina did) I haven’t posted a single entry on Party Girl since NOVEMBER. I apologize to the handful of people who read my blog and hopefully enjoyed it every week. But first and foremost I apologize to myself, because I love this blog and the outlet of creativity is grants me. I created this space for myself, to inspire me to cook (my most favorite thing to do), socialize, share and write more. However, I let my own personal issues and pain hinder me from writing (and even cooking!). When life was too painful to be at the restaurant, I found it selfish to come home and recipe test, let alone spend the 12+ hours it takes for me to finish a post (still rifled with spelling and grammatical errors, I know). I would like to take this opportunity to explain why I fell of the face of the blogosphere and explore the future of not only this blog but my personal health and wellness.
***Warning I will be discussing “feminine” issues such as periods and lady parts below, this will not be graphic but if you’re a wimp and can’t handle that I suggest just skipping to the yummy recipe and photos at the end!
As long as I can remember I have bad menstrual cramps. As I reached my mid twenties (when I was 24 was when it really got bad) these annoying cramps started to become debilitating. The first day or two of my period I would be unable to stand let a lone go to work, lying in bed with my hot water bottle and begging my parents for some sort of painkiller because nothing over the counter worked. About a year ago, at the urging of my father, I started looking into possible causes of this pain. Fibroids? Cysts? Endometriosis? There were a bevy of treatable and non treatable diseases which could be causing the pain. But then again it could just be that I had bad cramps. I made an appointment with my sister’s gyno and the nurse practitioner gave me a clean bill of health. She recommended birth control, specifically an IUD, to help alleviate the pain. I don’t want to get too into this, but I DESPISE birth control in almost any form (not condoms though – as RV’s mom told us freshman year of college “wrap it up!)”. Since I was 16 I have been on and off numerous types of the pill and the Nuva Ring, all of which made me crazy hormonal and not the regular happy go lucky girl I like to believe I am. Furthermore, I am at a high risk for breast cancer as my mother was diagnosed before the age of 50 (and survived without losing a single strand of her beautiful blonde hair). Long story short, I refused the IUD and figured it wouldn’t be the worst thing to live in pain one day every month.
Flash forward to this past November. The pain started 10 DAYS before my period even started and lasted for my entire cycle. At that point my sister (the unofficial family doctor who was just accepted in TUFTS MEDICAL SCHOOL) was convinced me there was something wrong. She just happened to be seeing our gyno, the wonderful and super awesome Dr. Deborah Ottenheimer (if you live in NYC go see this woman or just her practice, she is rad), explained what was going on with me and got me an appointment the very next day. Dr. Ottenheimer once again suggested an IUD, which she and literally every other medical professional agreed would be my best bet to alleviate the pain. For the time being she prescribed me Vicodin and I scheduled an appointment for two weeks later and was ready for the easy fix! Oh BOY was I wrong! The insertion itself was literally the most painful thing I have ever experienced, I almost threw up waiting for the cab ride home. The intense pain subsided but for the next two weeks I had constant cramps. I couldn’t work out, I couldn’t lift anything, I could barely be on my feet long enough to help with the dinner rush at the restaurant. At this point, my doctor realized there could be something seriously wrong and recommended a pelvic pain specialist, Dr. Kenneth Levey, at Pelvic Pain New York.
Before I met with Dr. Levey I had to fill out a twenty page history form, then there was another 10 page form when I arrived at this office an hour early (as instructed) rating levels and types of pain in different areas. After about thirty minutes speaking and a quick (spectrum free!) examination, Dr. Levey diagnosed me with a early stage of endometriosis and suggested surgery as soon as possible. (What is Endometriosis? I’m still now expert but it’s basically scar tissue in your uterus that can attach itself to other organs an causes CRAZY pain)(If you’re interested in more information check out the link or leave questions in the comments!) In some cases it can cause infertility. It’s somewhat scary but extremely treatable (I’ve been trying to keep my mind off possible fertility issues because it just stresses me out). He noted my history of growing pain and my lack of relief from birth control as red lights for the disease. We schedule surgery three weeks later and after a two week recovery I’m back at work and going forward with my life! I still have to treat the disease – just because it is removed does not stop it from coming back- and am starting some hormone treatments in the coming week. If you guys are at all interested in my post surgery medical life I’d be more than happy to share but for now I think that’s enough on my medical issues.
The reason I am sharing this all with you is that this disease and all the pain, suffering and recovery has brought me to a turning point in my life – I am 27 years old (relatively) healthy girl and I need to take advantage of that! Lying around for almost three months in constant pain and then another two weeks high on Percocet made me value life and what I do with it. I didn’t have the strength to go to work most days, let alone cook elaborate meals, host parties and then blog about it! I hardly left my apartment, saw friends rarely, never went to events but watched a lot of bad television. Now that I’m on the road to recovery, I want to spend the rest of my twenties (and hopefully 30s, 40s and so on) doing things that I love! And that includes this blog! For almost four months I have let pain hinder my work life, my personal life and my hobbies. This blog makes me happy because it is an outlet for me to be creative and share thing I enjoy.
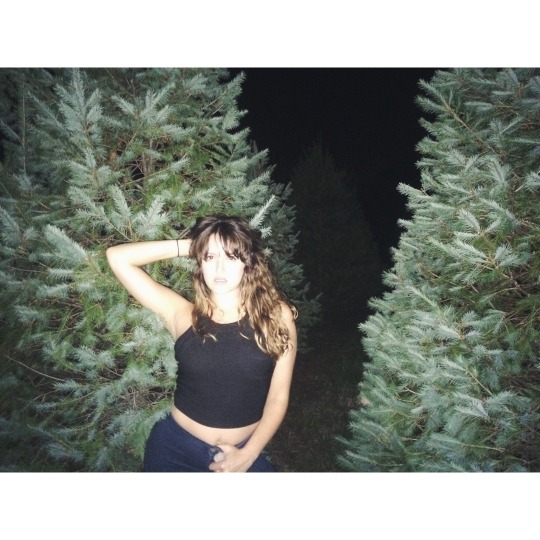
The moral of this big serious post, there are going to be some changes in my life and on this blog. Being sick, figuring out what was wrong, needing surgery and the recovering was a wake up call to start living a healthier and more active life. And I want to reflect this new lifestyle in this blog. I am eating healthier – so far I’ve cut all all processed food, eating only grain free and organic meat, whole grains, no refined sugars and dairy free as much as possible. (It’s been a month and I’ve only caved to one tiny canoli – but I’m Italian so I pretty much couldn’t resist) I’m trying to live a more organized, active and social life, and hopefully soon when my body has fully healed, work out more (I already had a private yoga session last week)! I also dyed my hair back to brown and cut my bangs back to start feeling more like myself! Furthermore, I want to spend more time doing things that I enjoy doing! Specifically, pursuing creative outlets (other than cooking) like my dorky crafts, passion for braiding and cross stitching. And I want to share these things with you! I want to post more often about more things and I hope you will enjoy them!
So to sum this all up, I’m sorry I was gone, I’m happy to be back and I hope any other ladies out there experiencing similar pain and confusion may read this post and go get some help. I thought I was super healthy with bad menstrual cramps for over two years and boy am I am glad I finally got help! Please leave any questions, support or concerns in the comment section – I’d love to start hearing from you (whoever you are!)
And just because I’ve been gone so long I’m sharing an original recipe for balsamic braised lamb shanks! Not the healthiest dish (seeing that there’s all that yummy brown sugar I’m no longer eating) but it’s a DELICIOUS recipe, that’s perfect for these last cold nights!
Serves 4(ish)
INGREDIENTS
4 small-sh lamb shanks
2 celery ribs, finely chopped
3 small carrots, finely chopped
2 small onions, finely chopped
2 cups red wine
1/2 cup balsamic vinegar
2 tbs flour
1 tbs butter
2 tbs brown sugar
1 cup beef broth
1 bay leaf
1 bunch of thyme, tied together with twine
salt & pepper
1 stick butter, melted (You can use less if you like but why?)
PREP
1. Preheat oven to 350. Liberally season lamb shanks with salt and pepper. Melt butter in large dutch oven over medium high heat. Brown lamb shanks on all sides, about 10 minutes all together. Transfer lamb shanks to a plate
2. Add chopped carrots, onions and celery (aka your mirepoix if you wanna get fancy) to dutch oven and sautee, stirring occasionally, until onions are brown , about 6 minutes. Add flour; cook, stirring constantly, until well combined, 2-3 minutes.
3. Stir in wine, balsamic vinegar and brown sugar, then add lamb shanks with any accumulated juices. Bring to a boil; lower heat to medium and simmer until wine is reduced by half, about 25 minutes.
4. Add all herbs to pot. Stir in stock. Bring to a boil, cover, and transfer to oven.
5. In a large bowl lightly mix together cornbread, pancetta, chopped sage and half of the melted butter.
6. Cook until lamb shanks are tender, 2–2 1/2 hours.
TIP
Serve with mashed potatoes. Really, whenever you braise something, it should be served with mashed potatoes.
You can transfer shanks to a serving dish and strain braising liquid and serve on the side. Or serve it “rustic” aka lazy style in your dutch oven and let everyone dig in!
AND JUST BECAUSE I WAS GONE SO LONG – HERE’S WHAT I’VE BEEN UP TO LATELY SLASH SOME NOT TOO GROSS SURGERY PHOTOS


 SHEPARD’S aka COTTAGE PIE